
This topic will take you through the steps necessary to turn your existing AR project into an MR project tracked from Zapbox pointcodes.
This process is a temporary solution while we work on improving the ZapBox support within ZapWorks Studio.
Preparation
Before we begin there are a few things you’ll need to prepare:
-
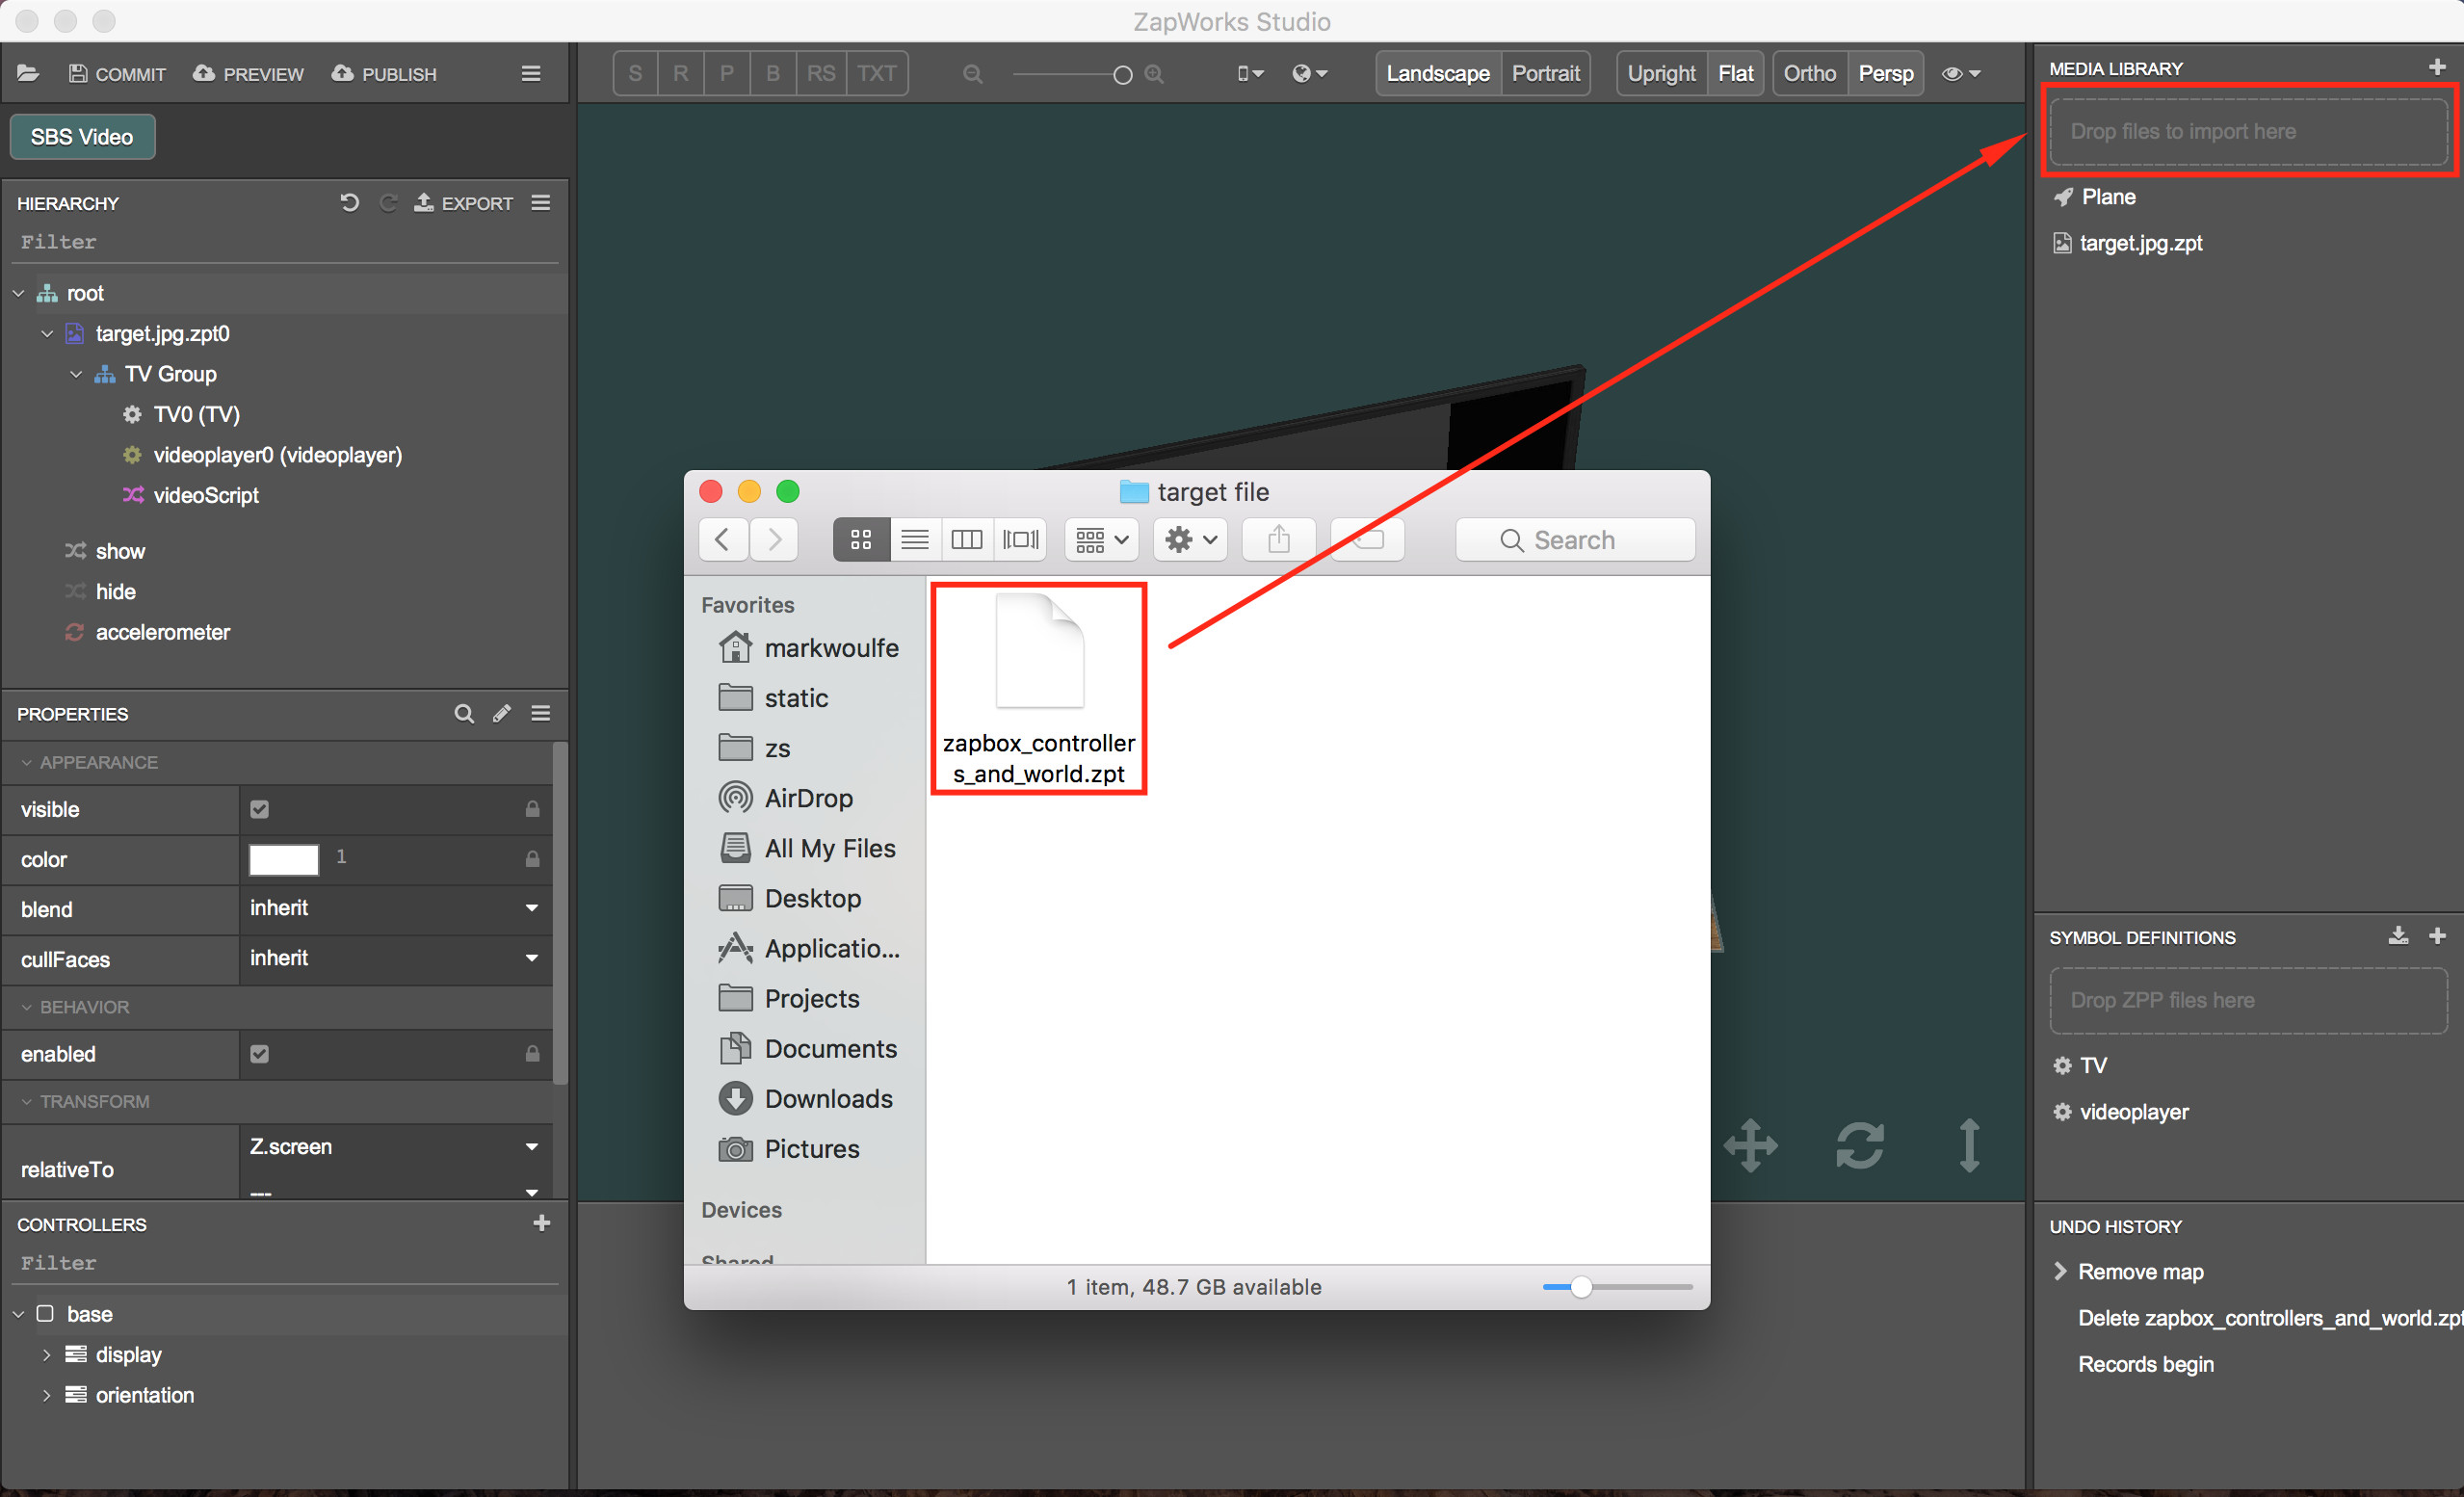
The ZapBox controllers and world “zpt” tracking file which can be downloaded here - zapbox_controllers_and_world.zpt (21.8 KB). This allows tracking from the pointcodes and controllers within Studio.
-
The project which we will be using in this example is the one covered in the Step by Step Streaming Video in the 3D View article which can be downloaded here - SBS Video.zpp (1.0 MB) though feel free to follow along using a project of your own.
Project
Please refer to the screenshots below each step for clarification on the actions required.
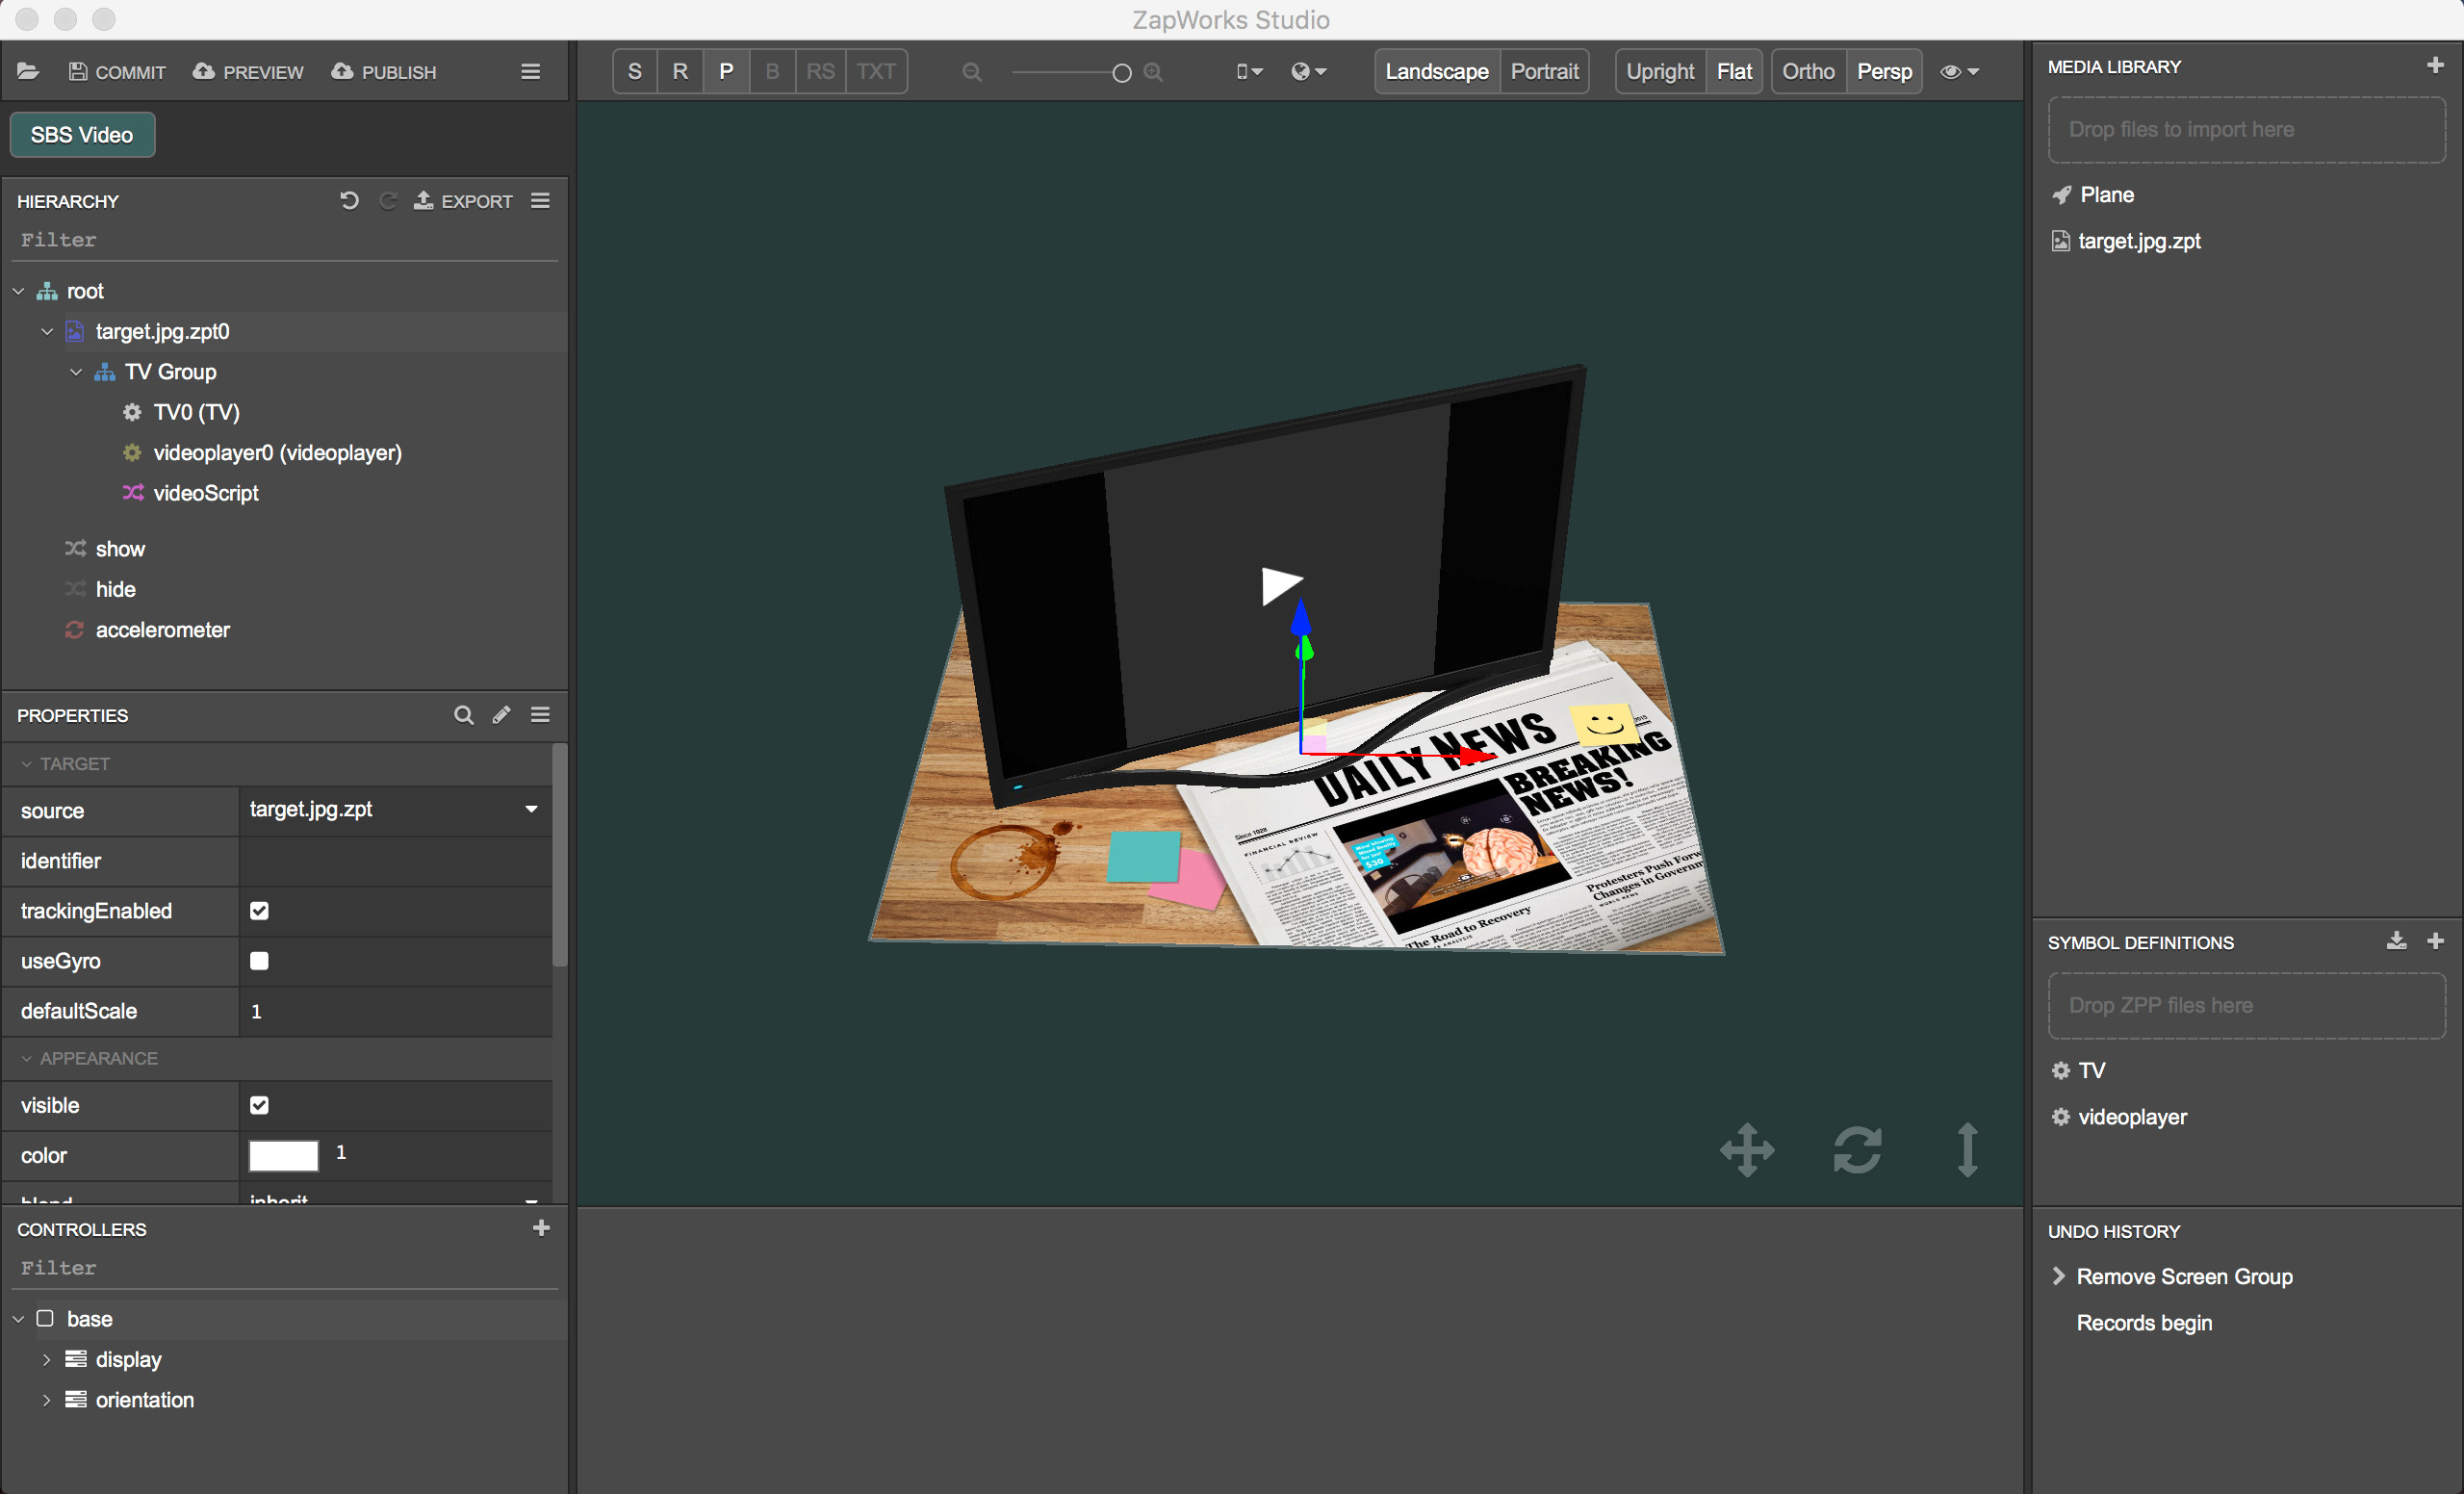
- Open your AR project in Studio. In the project we’re converting we have a 3D model of a TV, a videoplayer and a script node within a group, tracking from a target image.
- Drag the controllers and world zpt tracking file into the import box of the Media Library. It should appear as an entry in the Media Library once successfully imported.
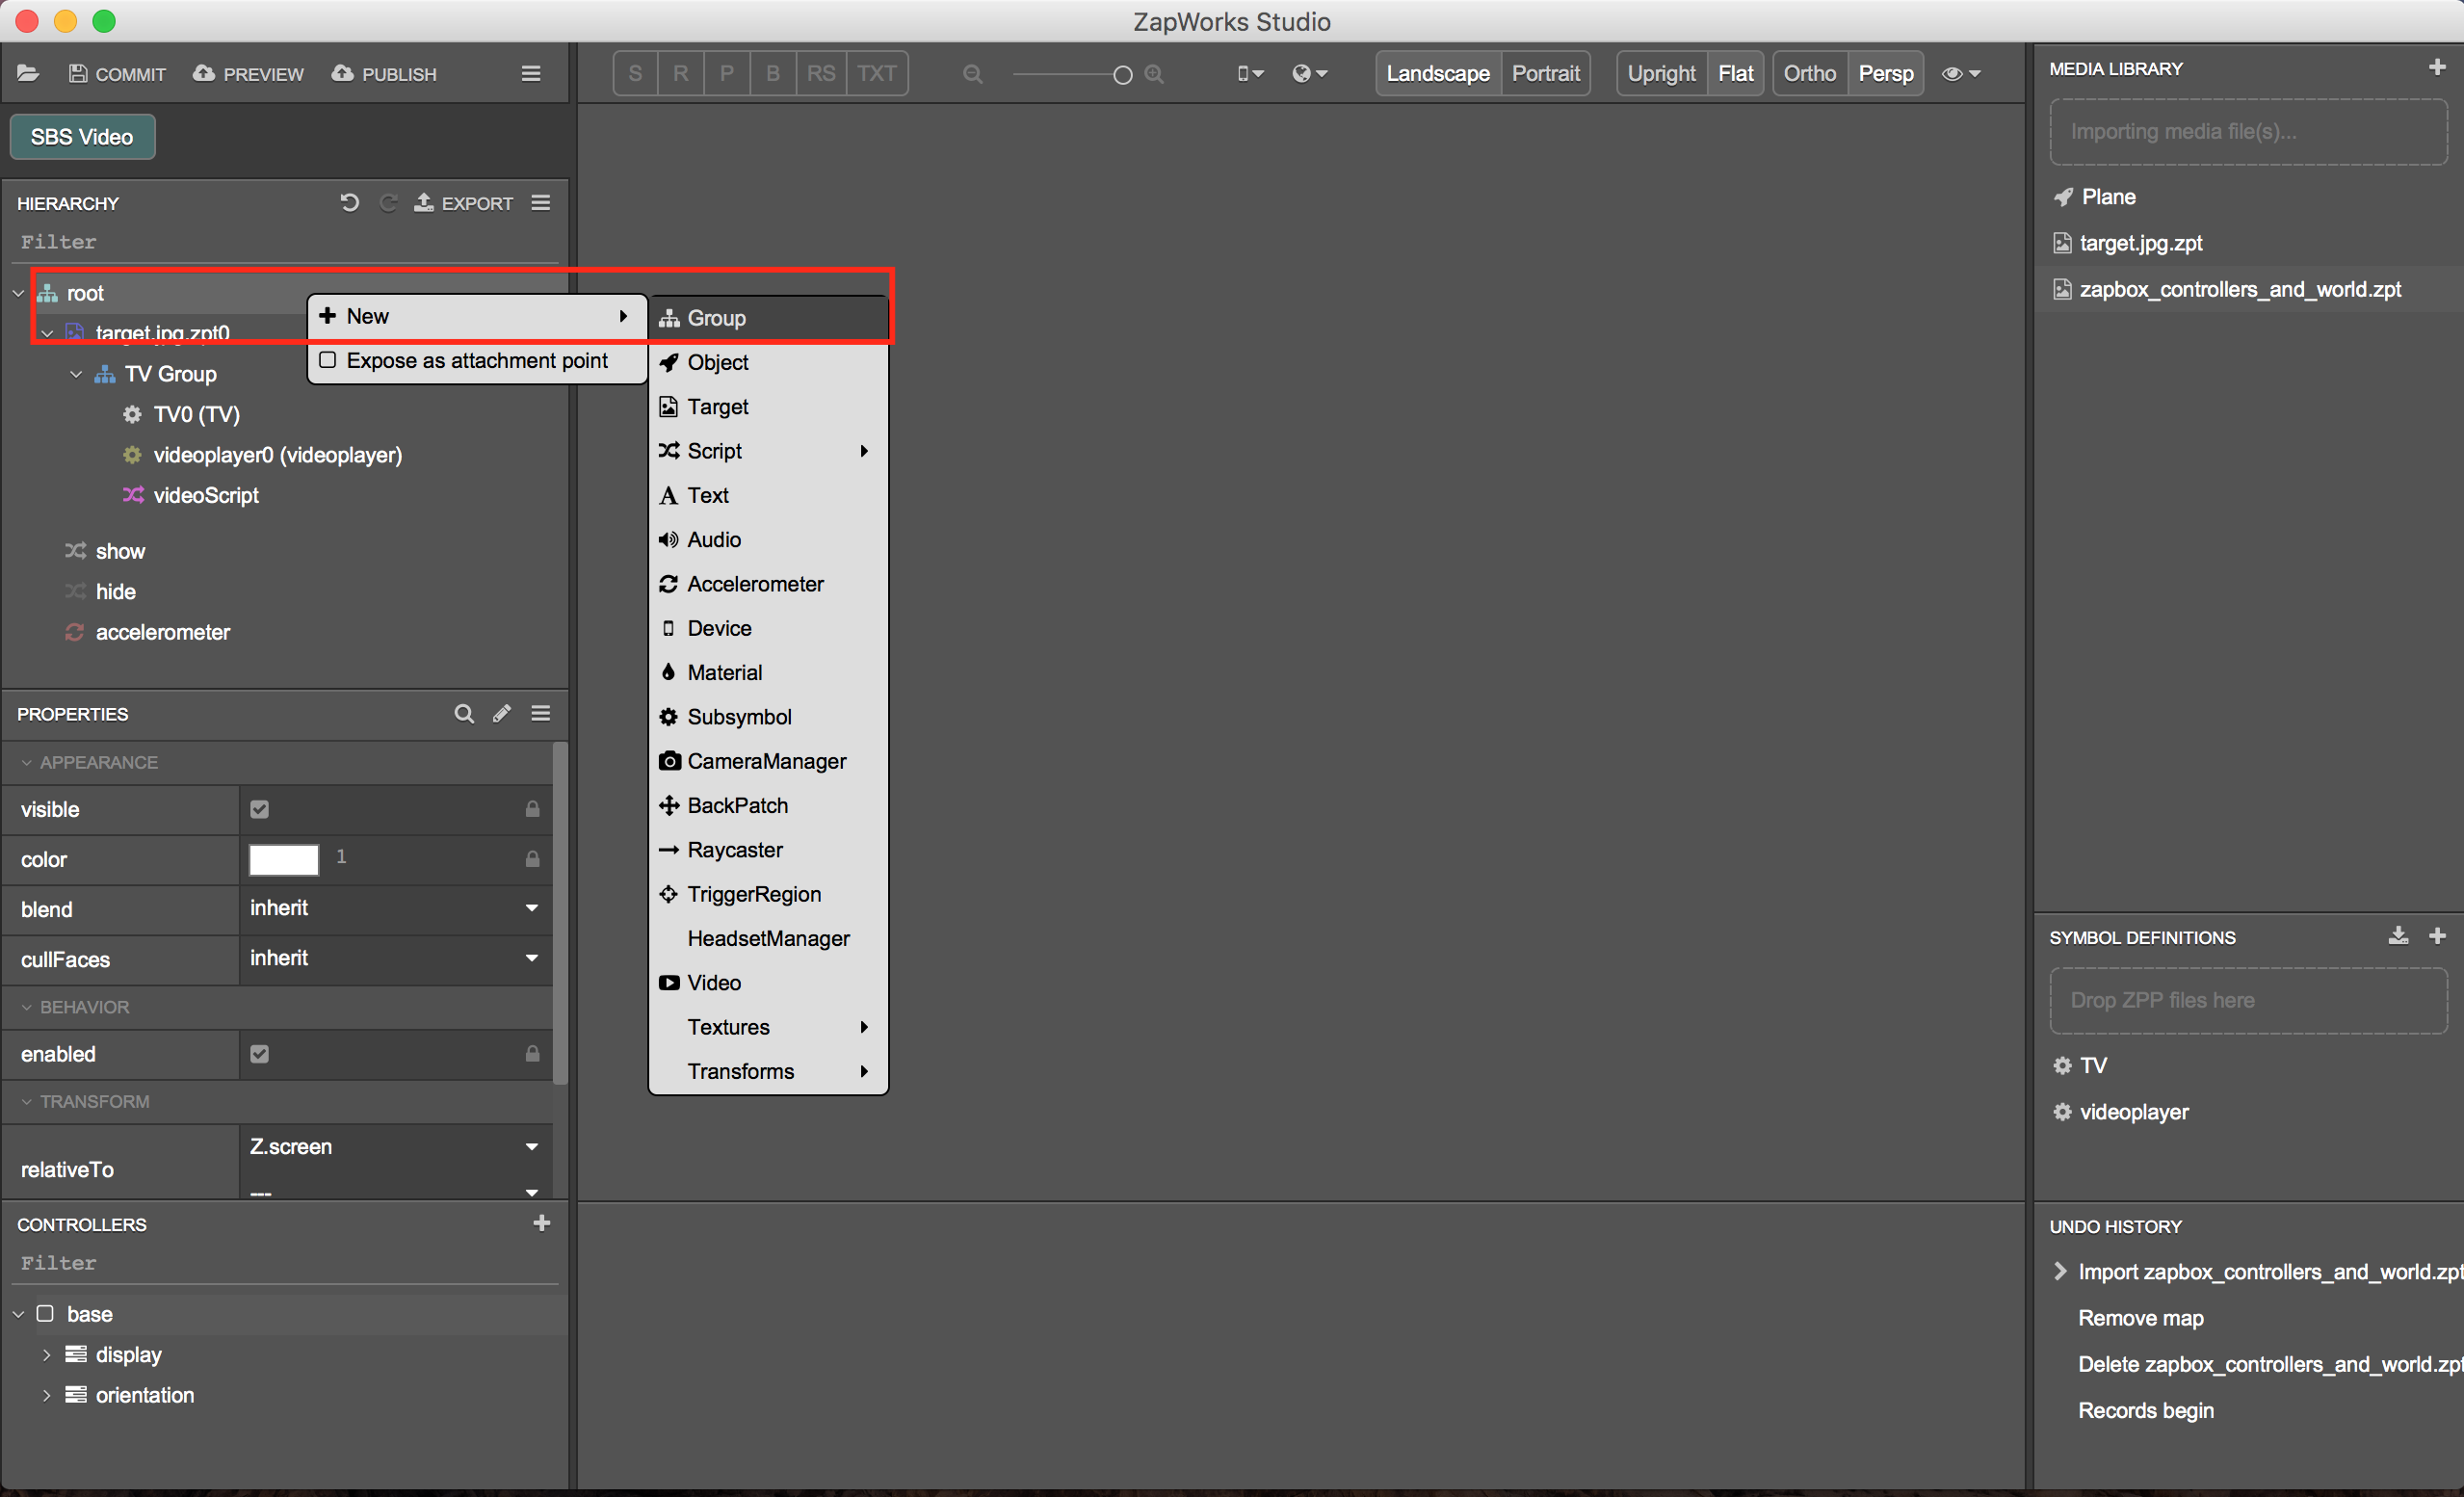
- Create a new group by right-clicking on the root node and name it ‘world’. This will represent the world space mapped out by the point codes and will be used later on.
- Drag the content you want to be tracked to the pointcodes into the world group. In this project the content sits within the
TV Groupgroup node, so we drag that into theworldgroup node. This will cause the content to jump to the screen but don’t worry, it will appear correctly when we run the experience in ZapBox.

- The previous target in the Hierarchy can now be deleted by right-clicking on it. We’ll be using the ZapBox target file we imported into the Media Library in a script later on. More than one target file is not currently supported in the Zappar platform.

- Create a new blank script node from the right-click menu of the root node. This script node will house the code used to identify the pointcodes and place the content on them.

- With the new script node selected in the Hierarchy, click and drag the
worldgroup node into the script editor window and select ‘Insert local variable’. This gives us a reference to the node which we will use later on.

-
Create a new Z.TargetFinder (reference code can be seen below) and set its source to the controllers and world target file by dragging it into the script editor window, between the parenthesis, from the Media Library and select ‘Insert media file reference’.
var targetFinder = Z.TargetFinder();
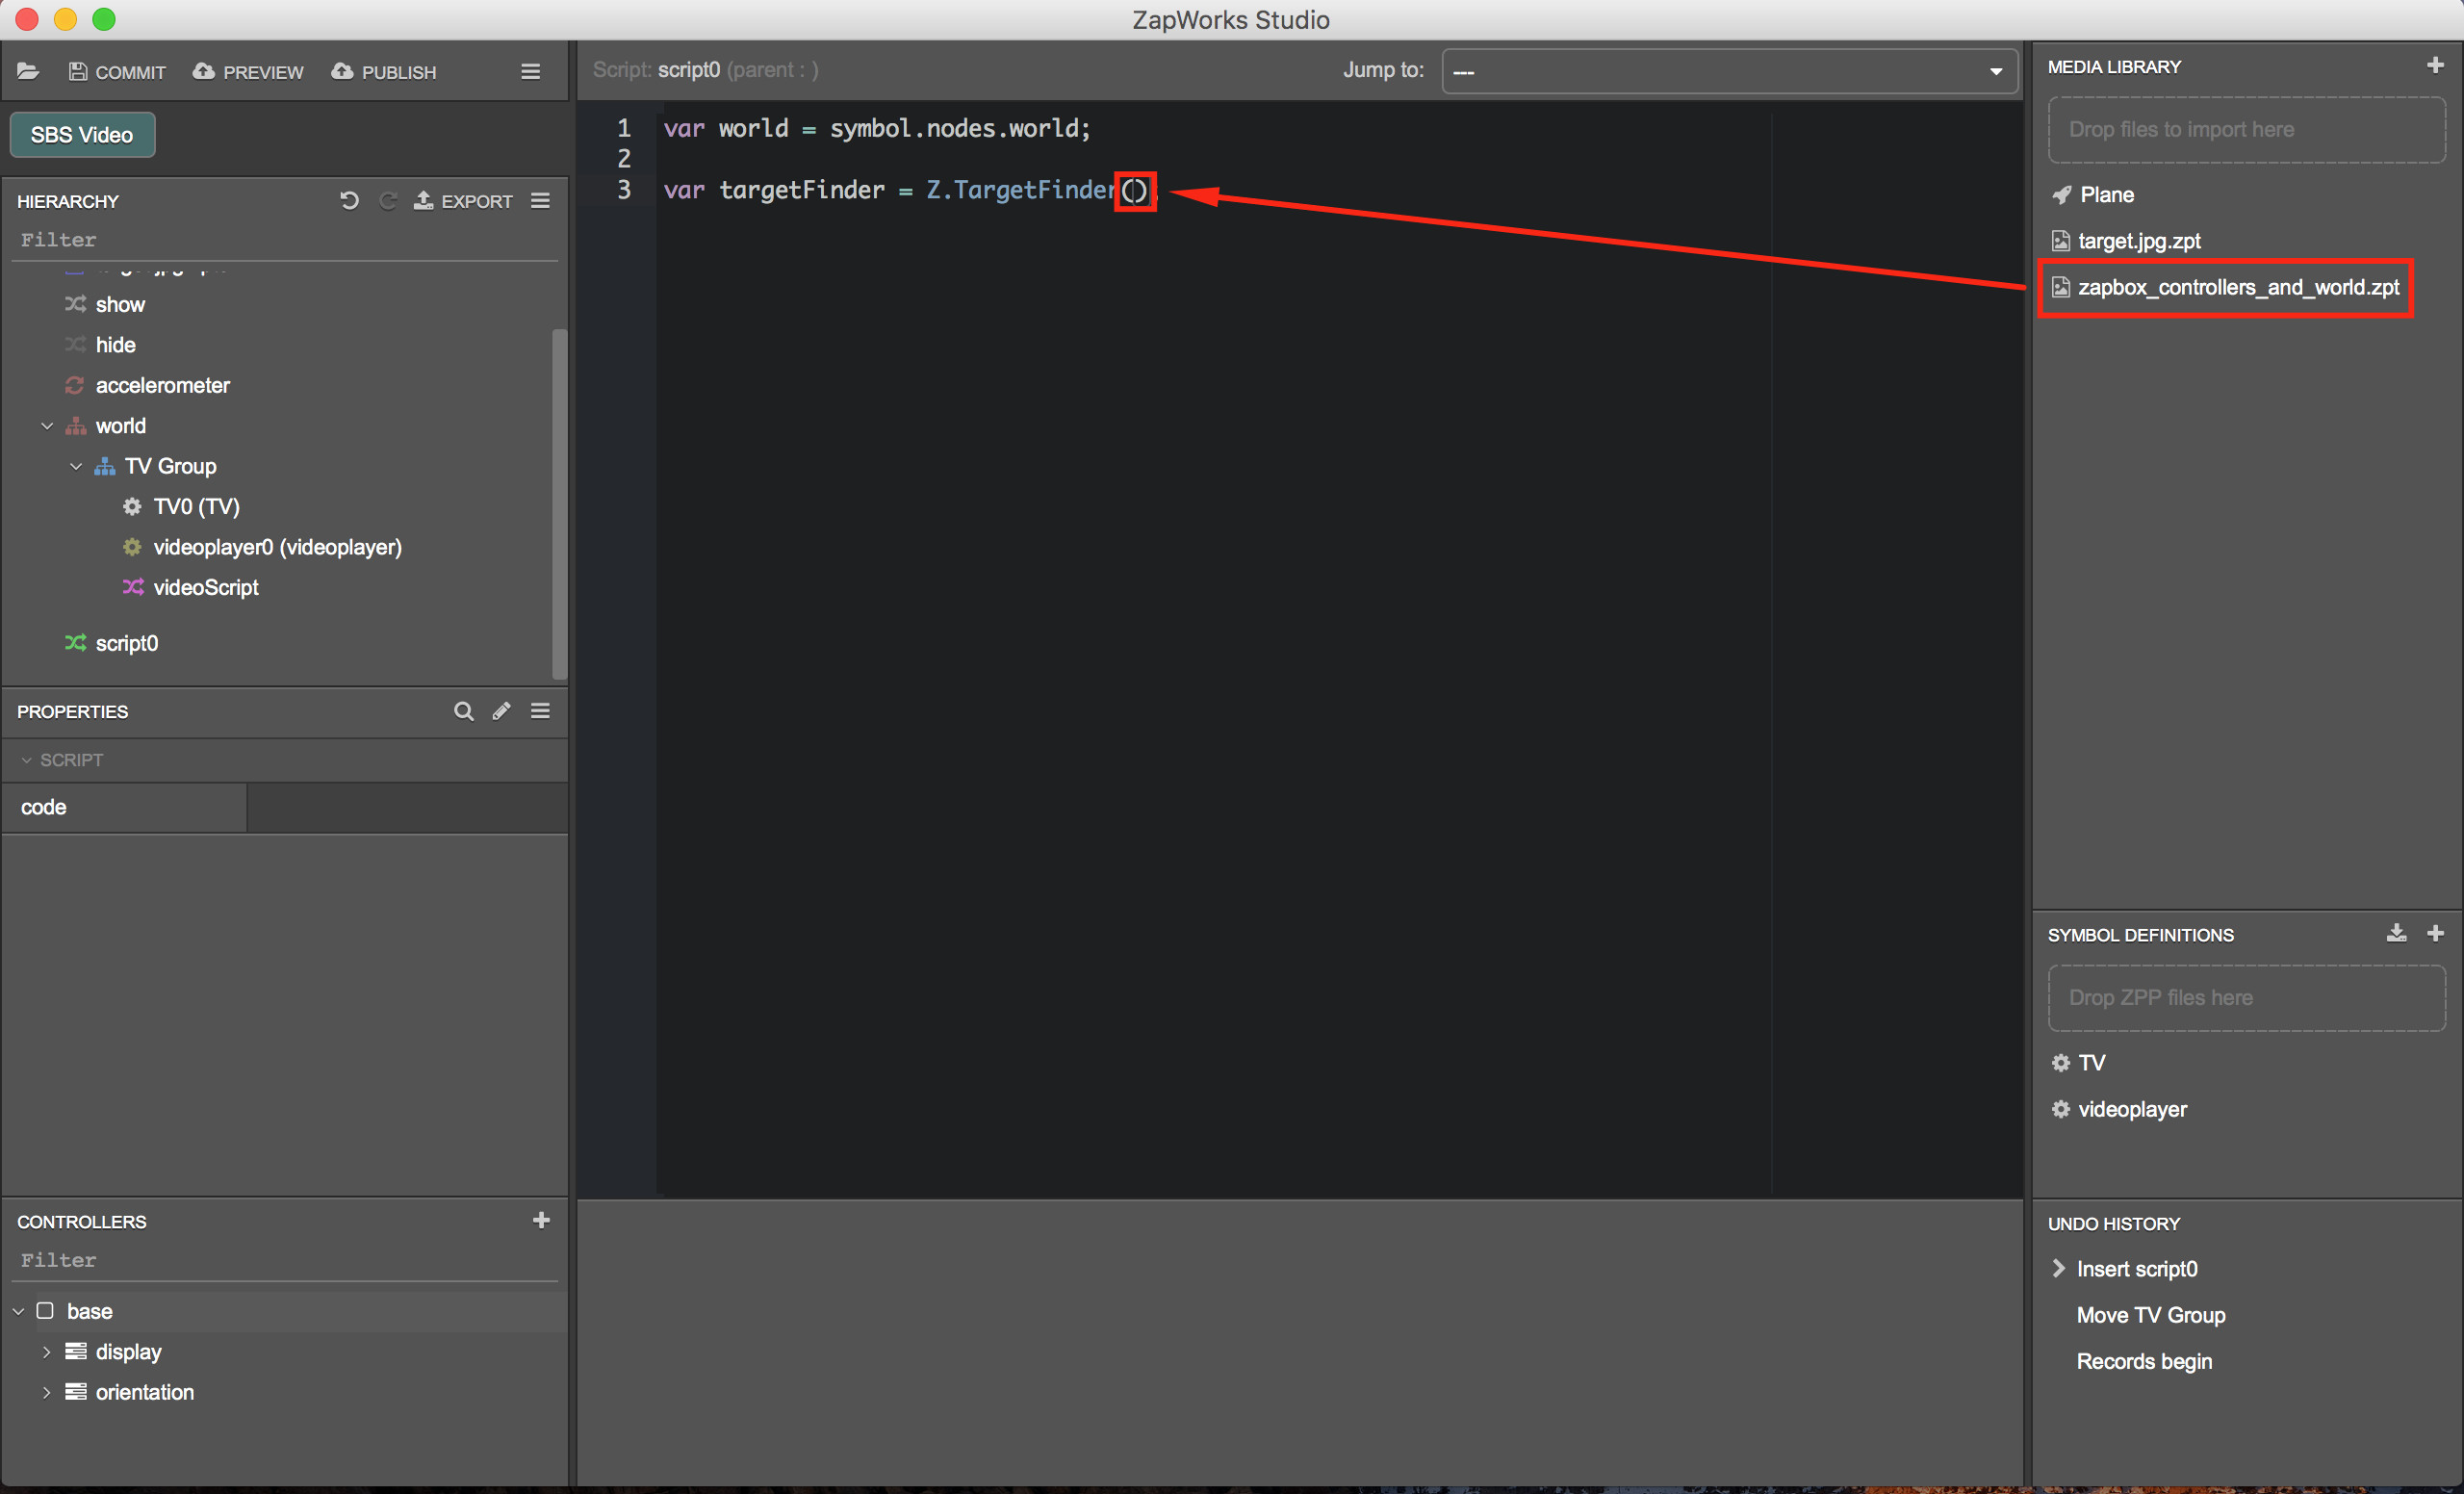
Your script should now look something like this:

-
Create a
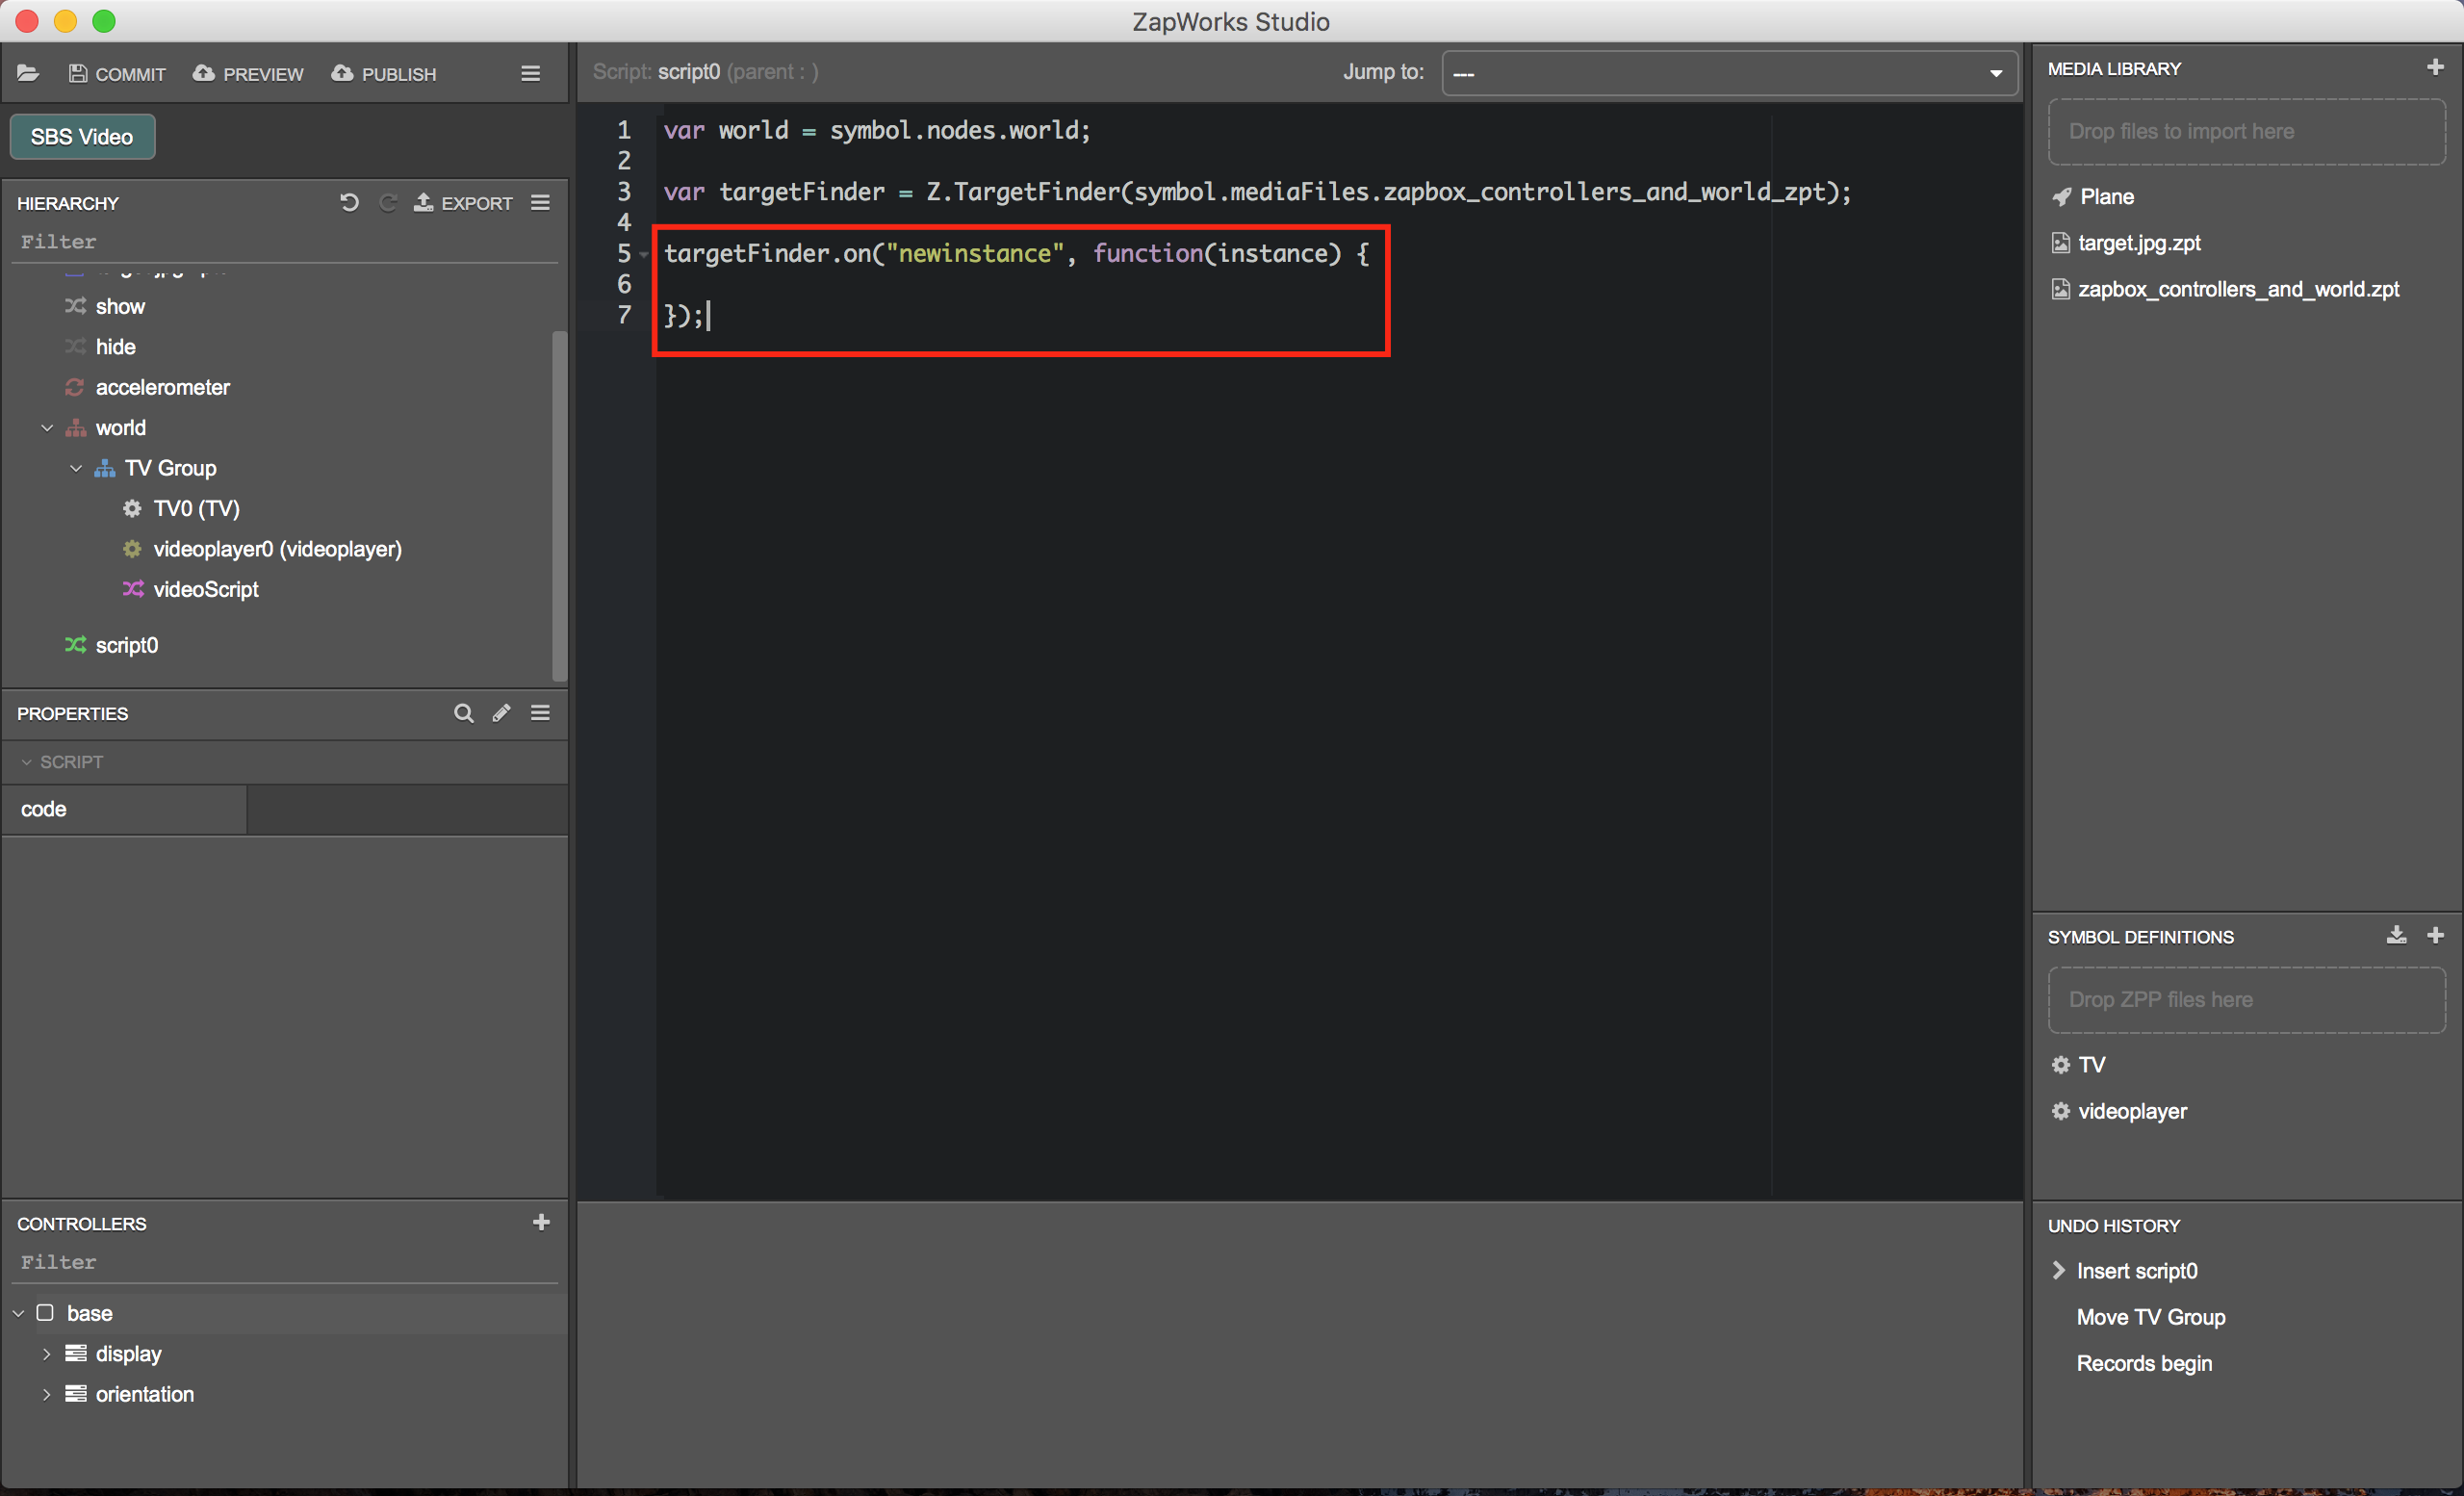
newinstanceevent handler function for the target finder, which will be passed the instance of the target that has been detected as an argument (reference code below). Please see our General Principles page for more information on event handler functions.targetFinder.on(“newinstance”, function(instance) {
});
-
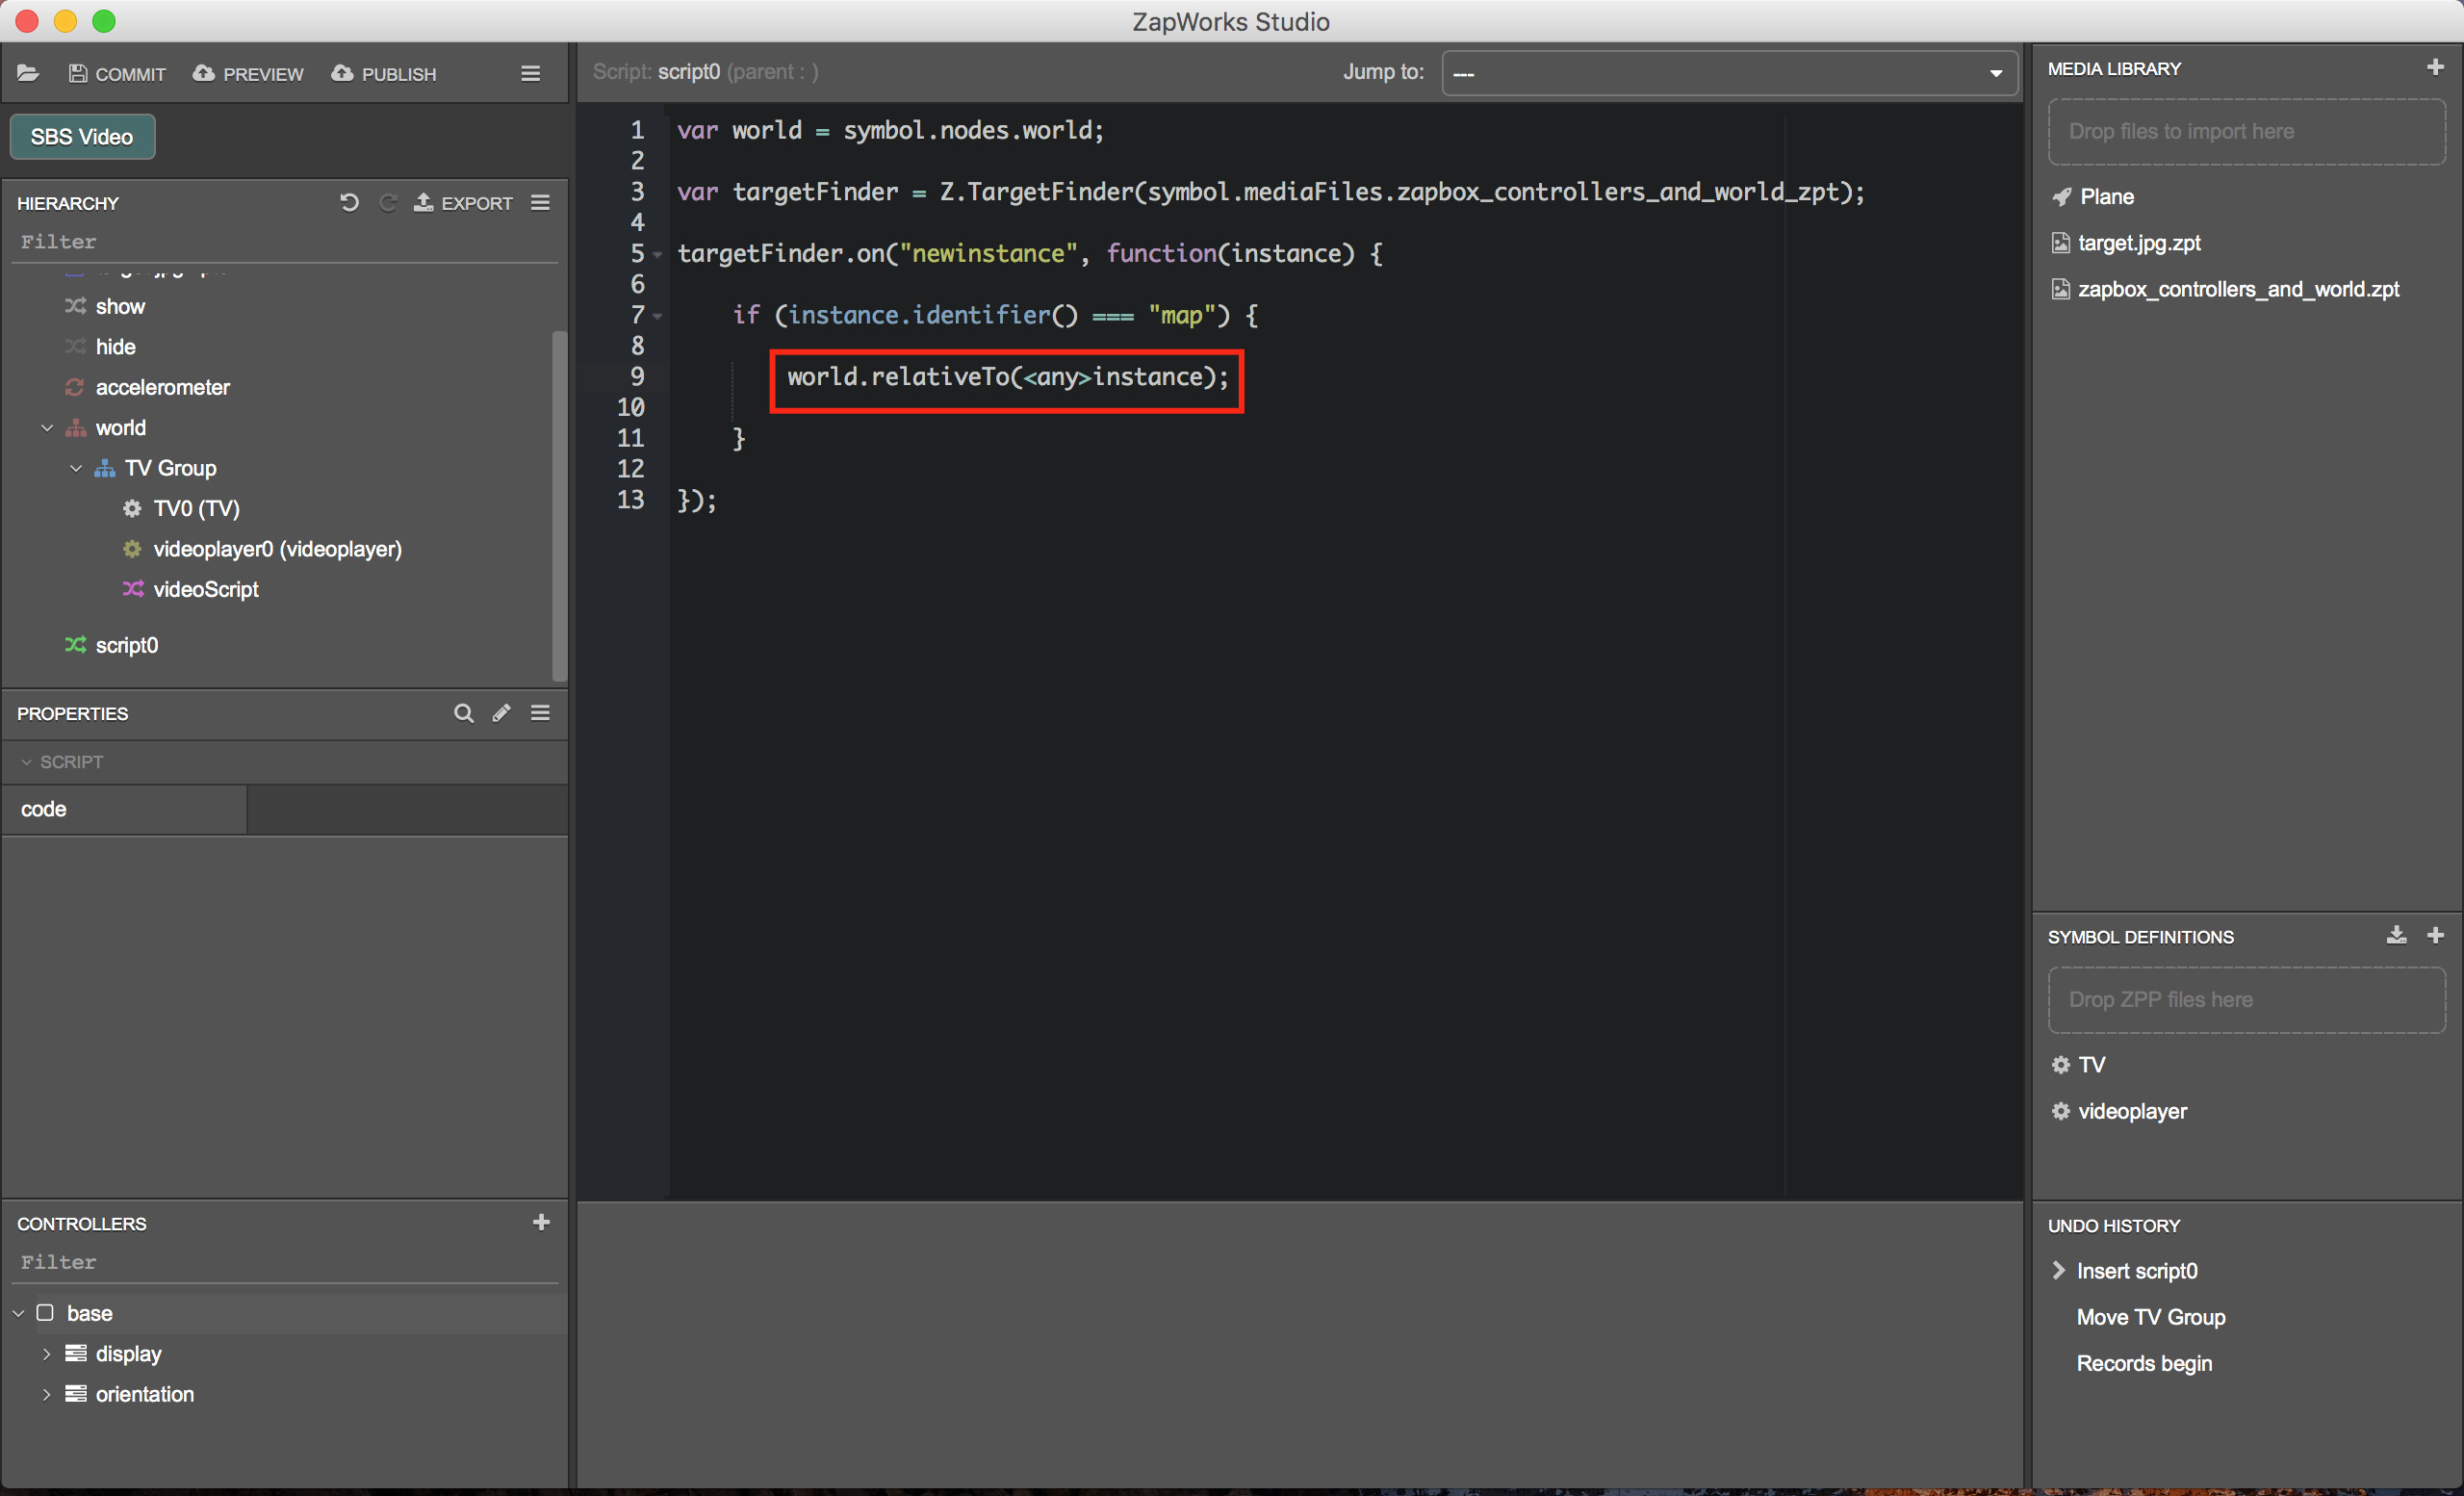
Within the
newinstanceevent handler function, add an if statement to check the instanceidentifier()and see if it equals ‘map’ (reference code below). The map defines the space laid out by the pointcodes.if (instance.identifier() === “map”) {
}

- Inside the if statement set the world node (using its variable name in the script)
relativeTothe instance identified as themap(see reference code below).
The instance needs to be casted as an
anytype to avoid throwing an error, this is necessary at this point in time.
world.relativeTo(<any>instance);
- To be able to preview our experience better in Studio we’ll create a new group, calling it ‘world-sim’, and place our
worldgroup within it.

- Set the
relativeToproperty of theworld-simgroup toZ.Cameraand position it back from the screen in the Z-axis. The amount you’ll want to do this depends on the scale of your content but anything between -1 and -5 should suffice.
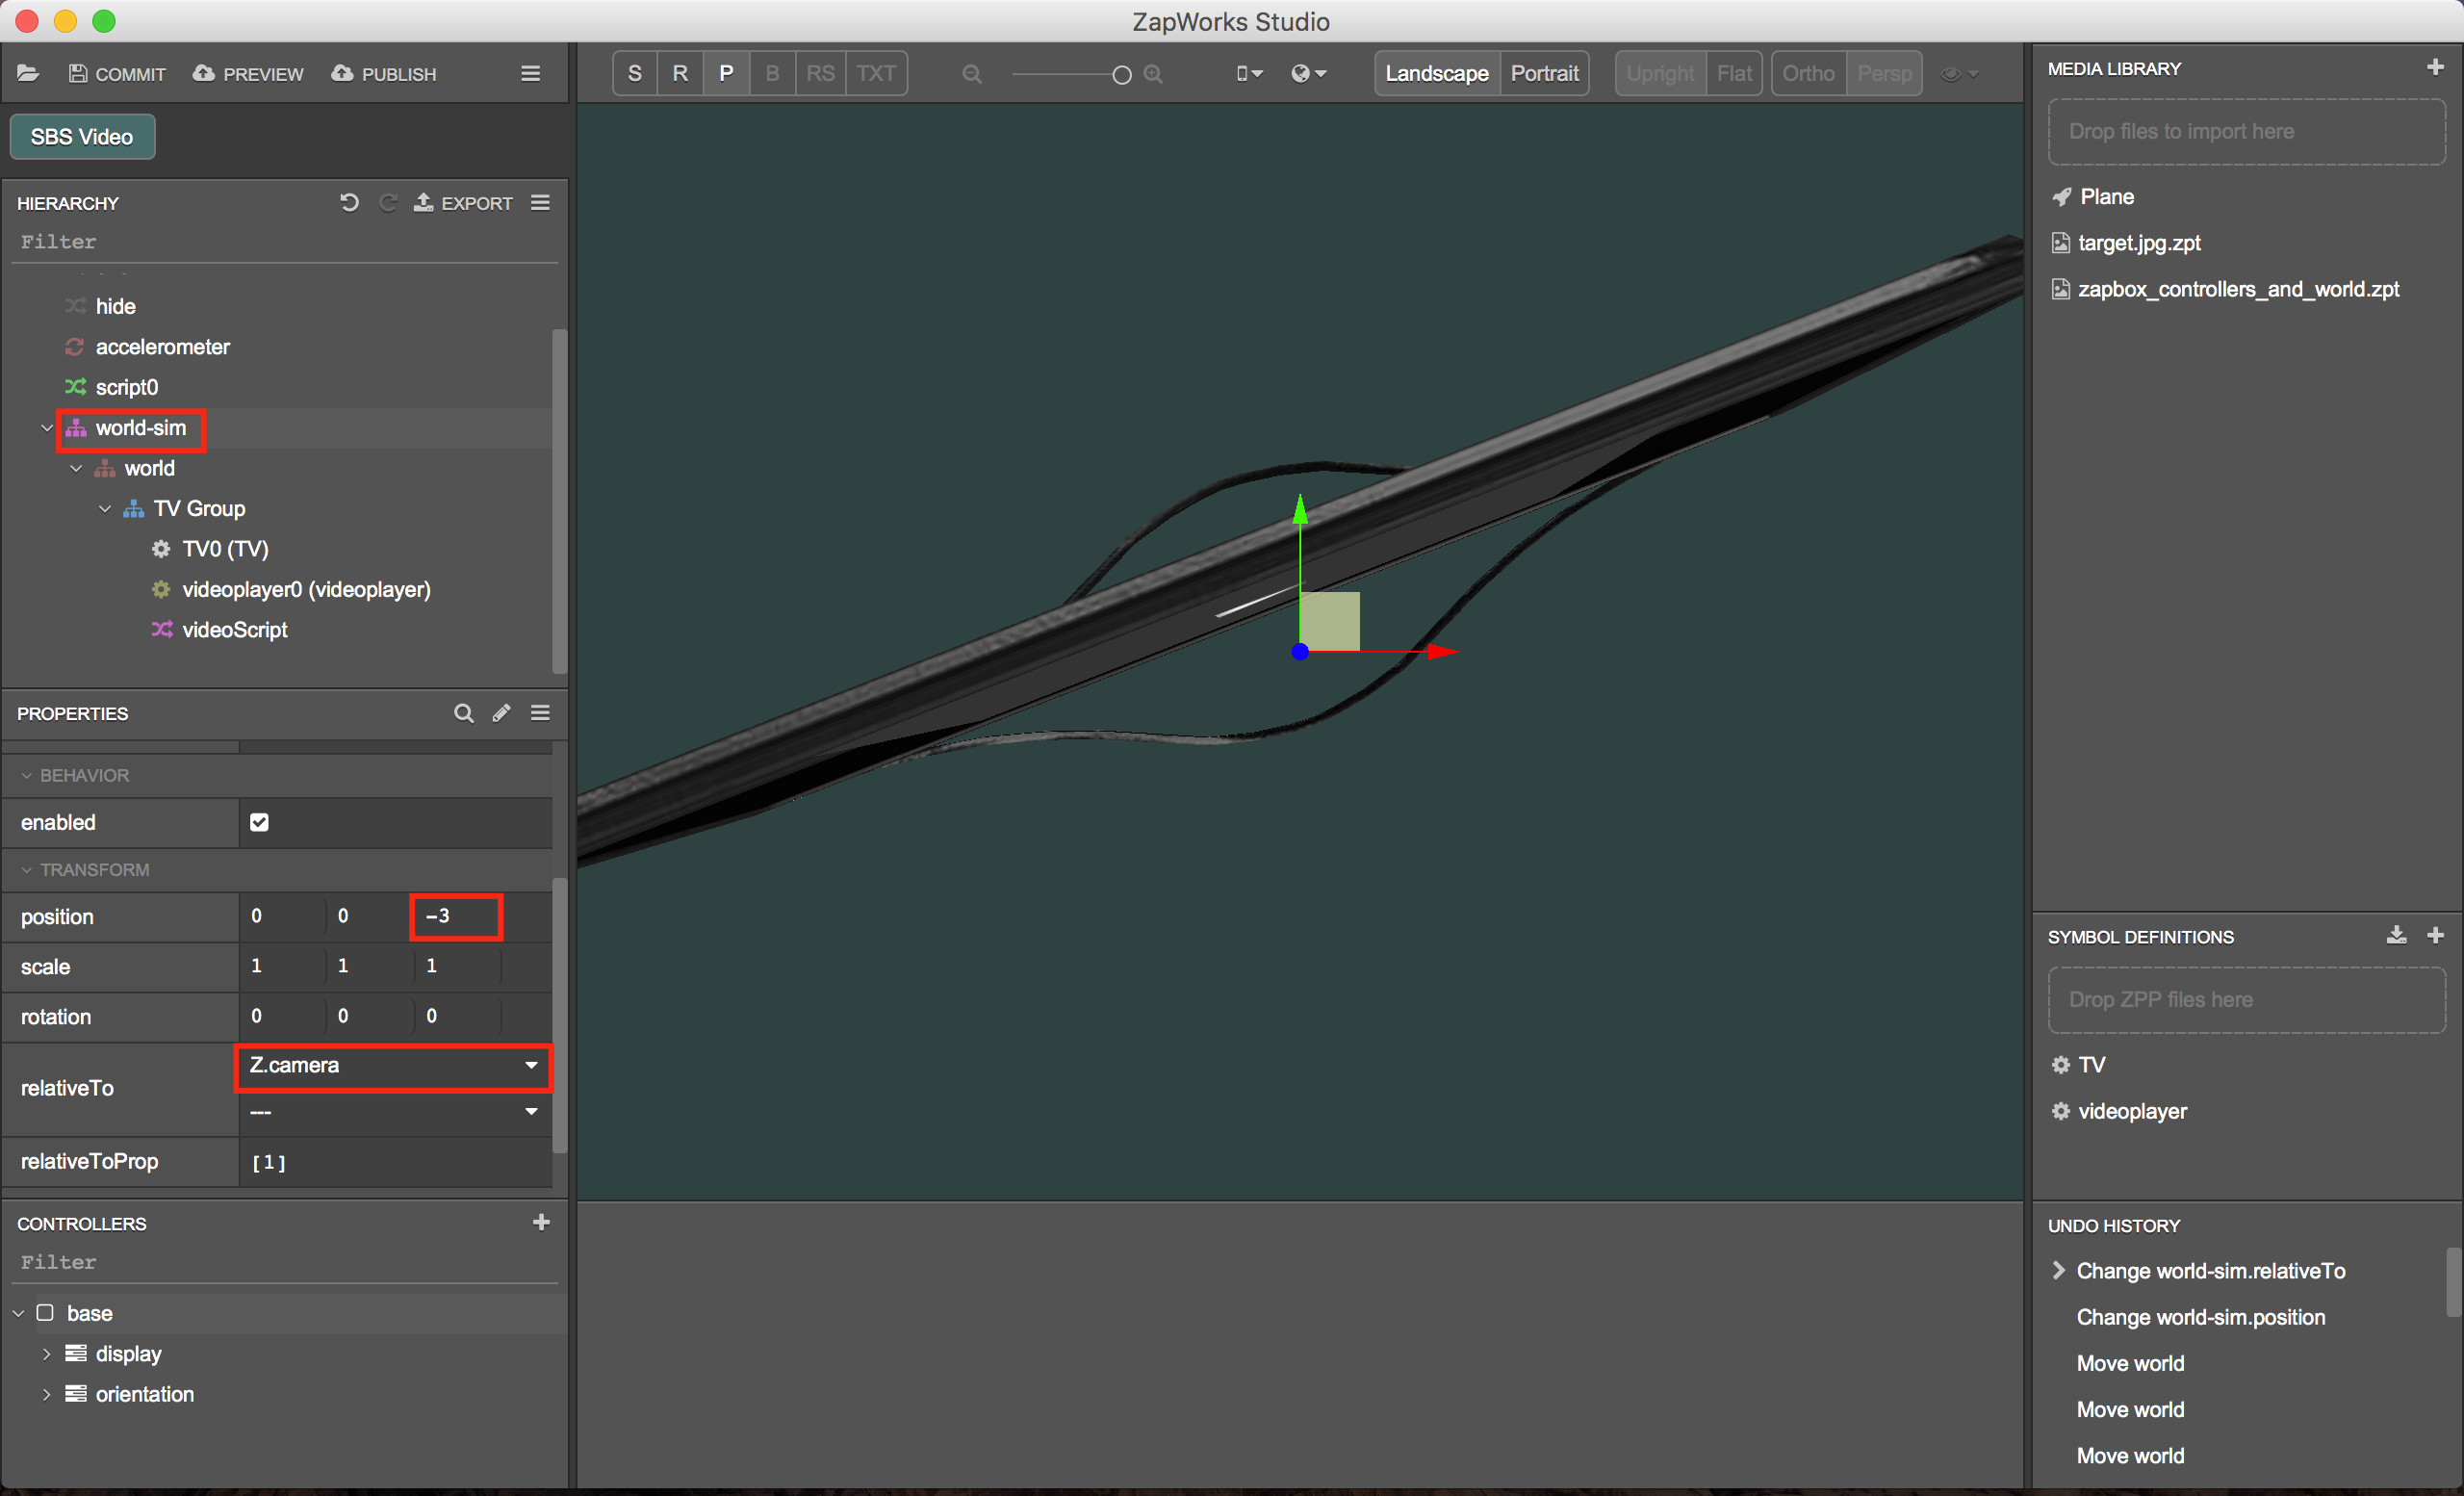
- The
world-simgroup can now be positioned, scaled and rotated without risk of altering how the content appears when mapped to the pointcodes within ZapBox. This is because only theworldgroup has itsrelativeToproperty set to the pointcodes, so we can alter the transforms of theworld-simgroup and it will be ignored when running the experience.

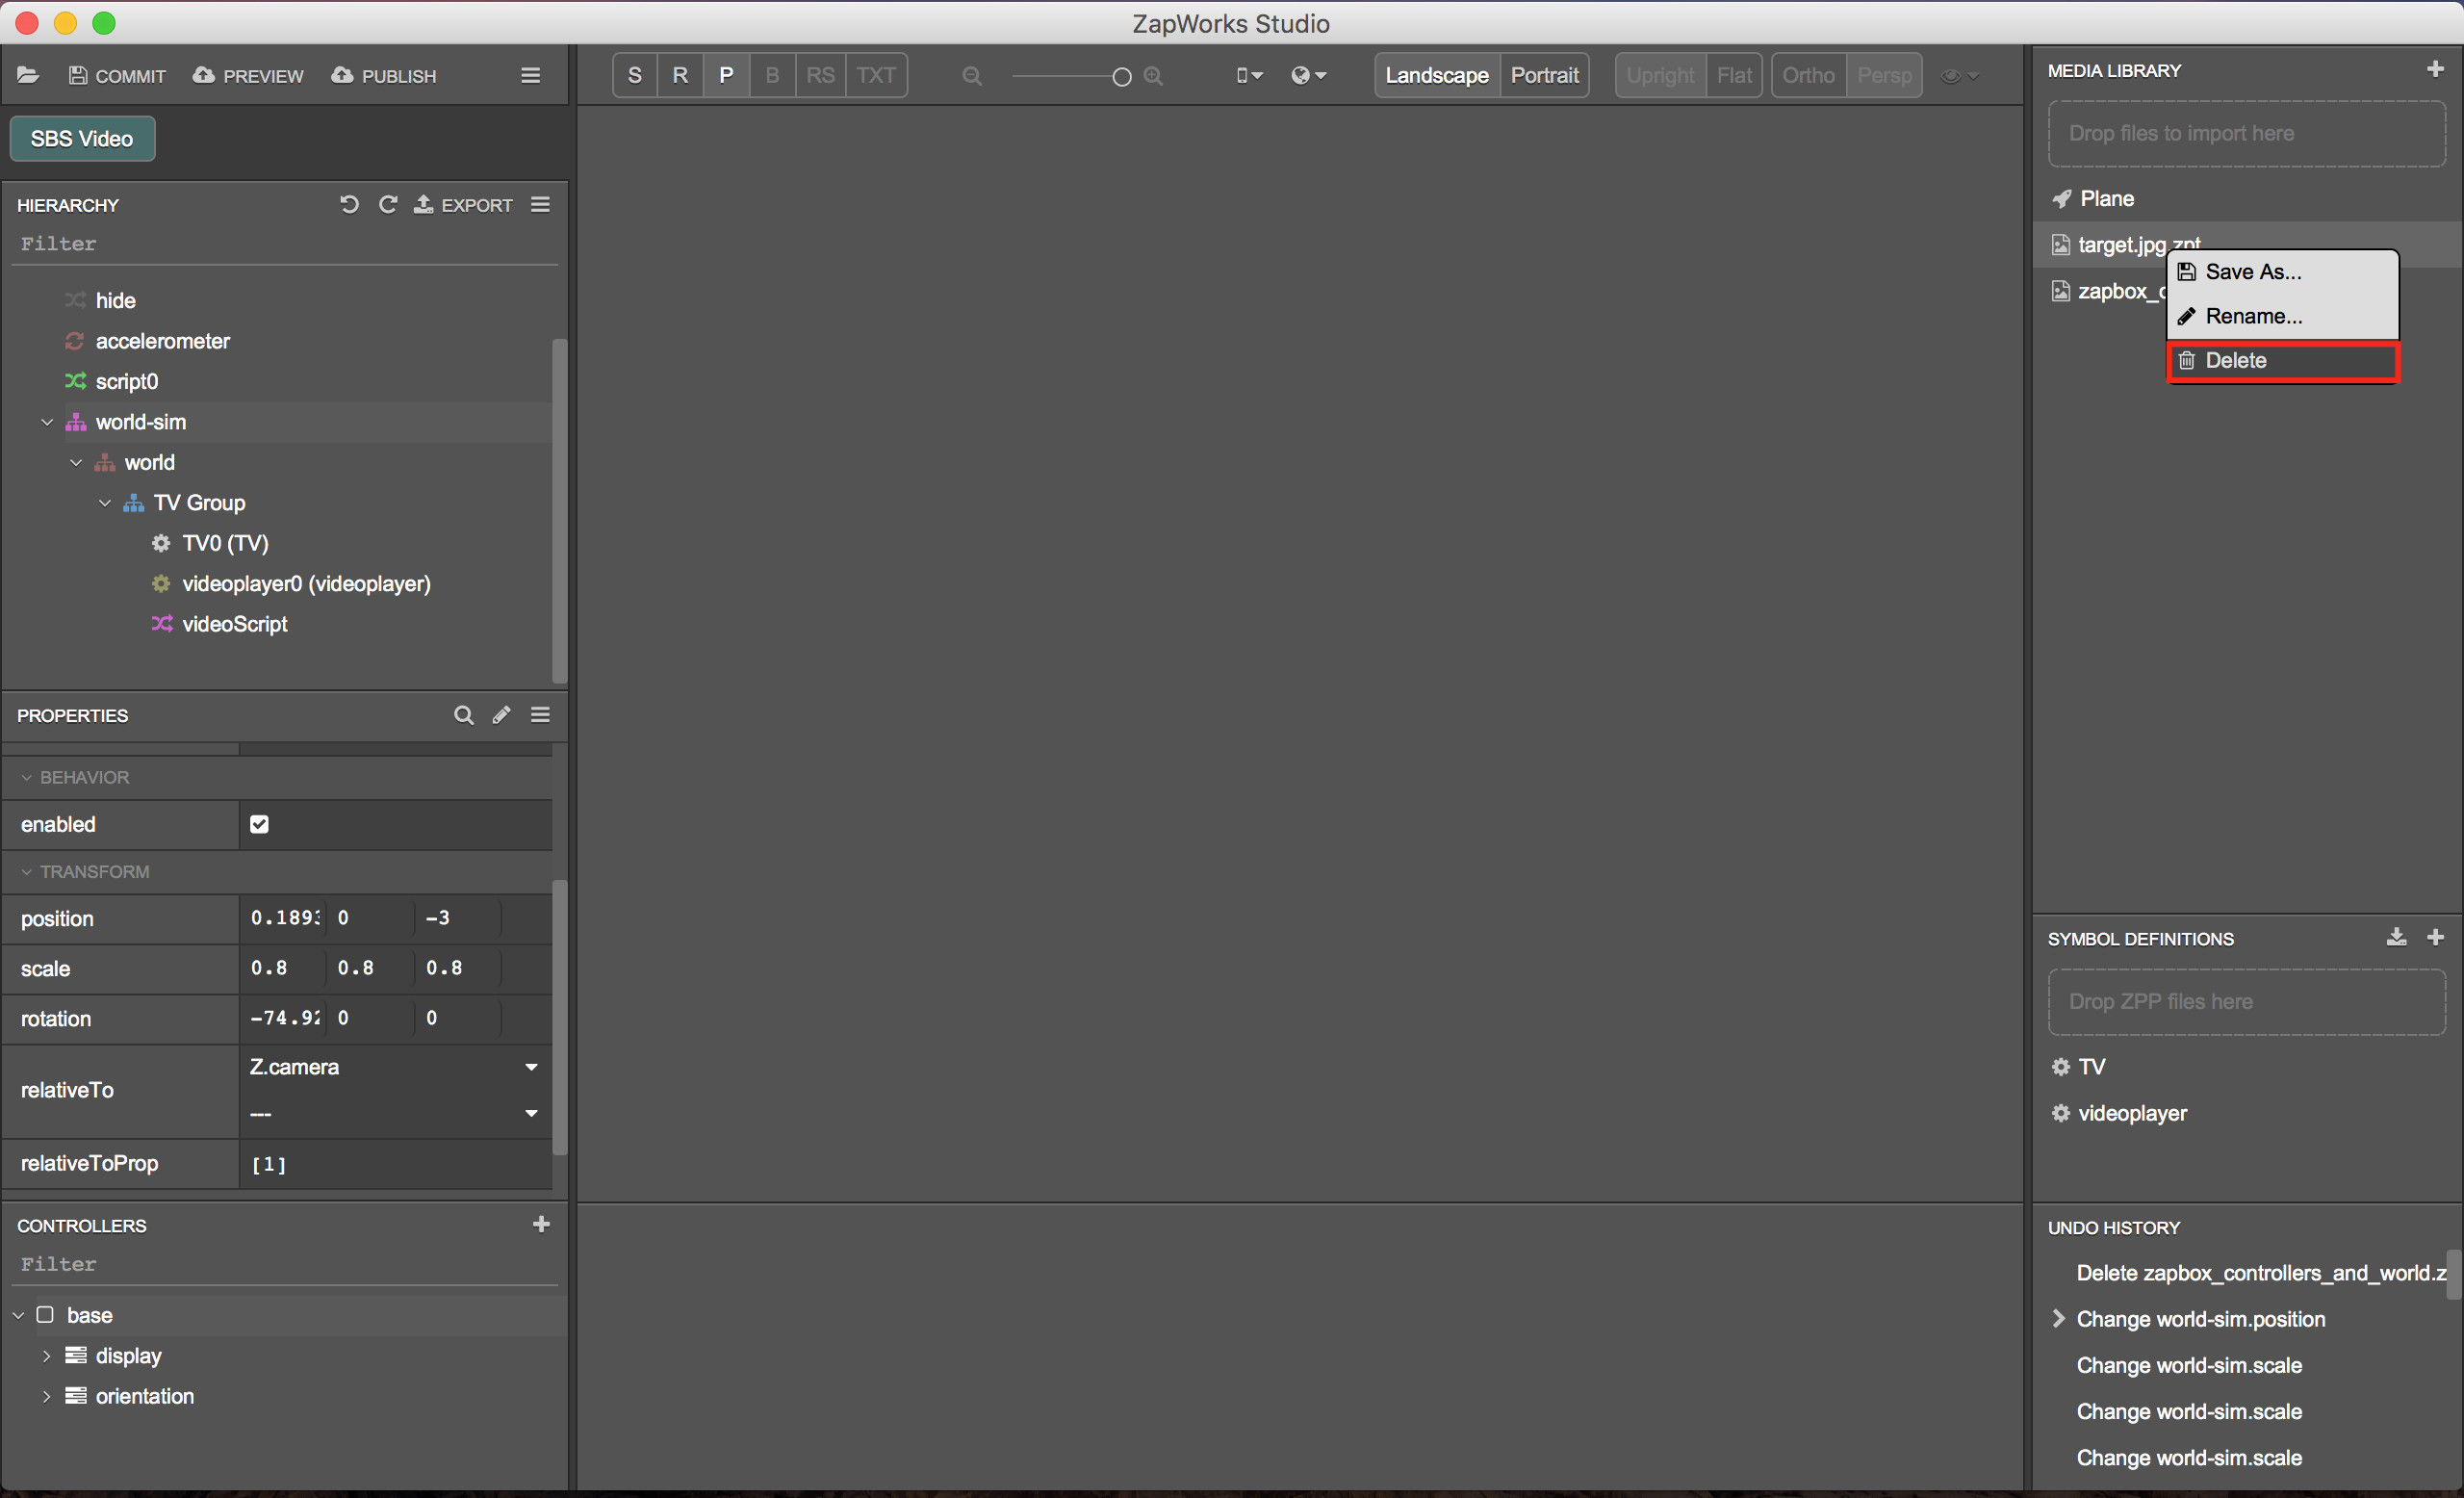
- Remove the old tracking file from the Media Library (by right-clicking on it) as it is no longer used, which will reduce the download size of our zap.
- Preview or publish the project and scan the code within ZapBox by selecting the ‘Scan Code’ option.
Make sure you’ve calibrated your lens and built your map before scanning the code.

Below is a screen-grab from a device running ZapBox after having scanned our preview code. We set out a simple ‘5 dice pattern’ of pointcodes for the demonstration.

Further Considerations
- To position content in the center of the pointcodes make sure all content’s transforms are zeroed out (
[0,0,0]) as well as the group(s) they are placed within (not including the world-sim group). In the example we covered theTV groupis placed back and to the left a little and is also rotated slightly, which you can see reflected in the screenshot above. - The scale of content is such that a plane with a scale of
[1,1,1]is 2 meters in width and height in the real world (1 meter in both directions from the center point). You can use this to serve as a guide when scaling your content.
