Hi Everyone,
Did you know you can customise the toolbar for experiences made using ZapWorks Studio?
The toolbar is shown by default in both the Zappar app and WebAR. It allow the user to reset the view back to scanning mode, flip the camera and view a list of recently scanned experiences.
For most use cases, leaving the toolbar to it’s default setup is perfectly fine but there are times when you might want to add an extra level of customisation by changing the colour or remove it entirely. This quick demo will show you how to do both.

Setting the colour of your toolbar (Zappar App)
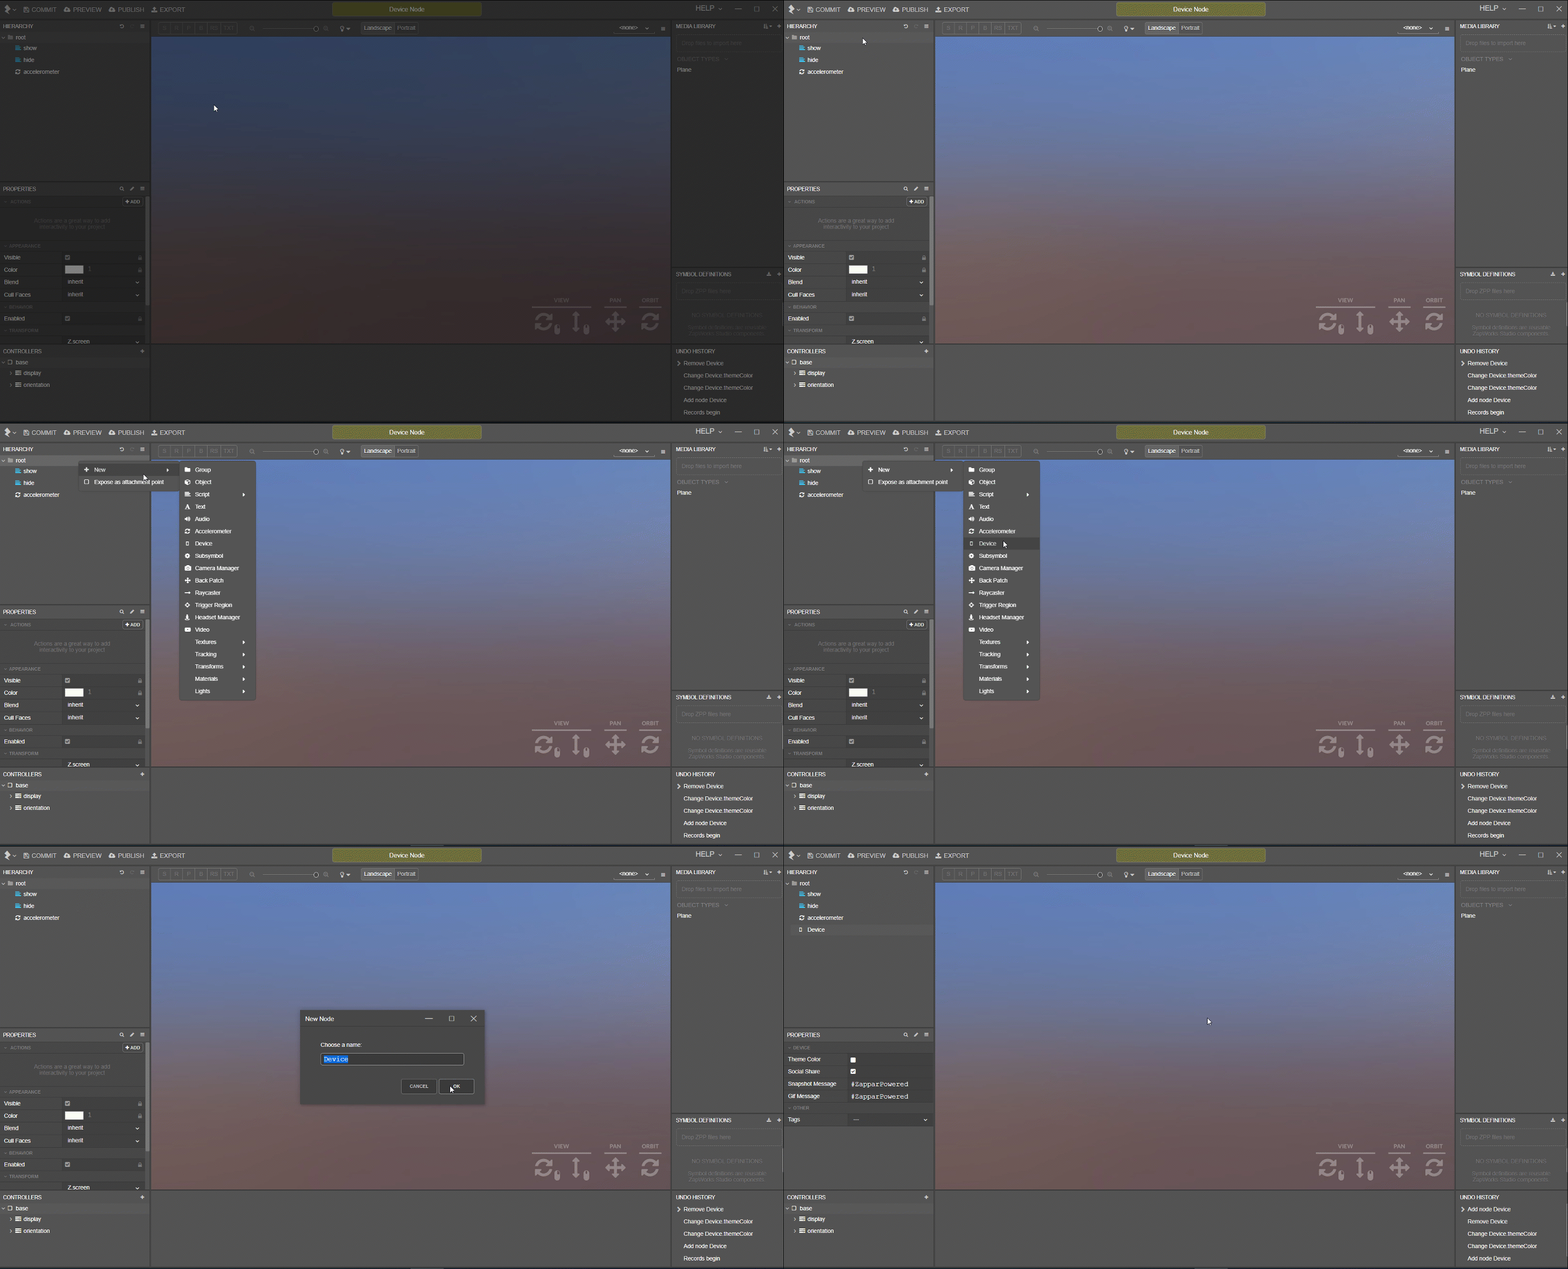
Adding the Device Node
- In your ZapWorks Studio project, right click on your root node and select ‘New’ → ‘Device’

- In the properties of your device node, select the check box next to theme colour to activate the feature. You can now select the colour picker and choose which colour you wish for the app to appear.

- Preview / Publish the project and launch it in the Zappar app, notice the toolbar colour change.

Changing the colour of the toolbar at runtime (Zappar App)
To add more control over when the app changes colour, you can add some extra complexion in a script.
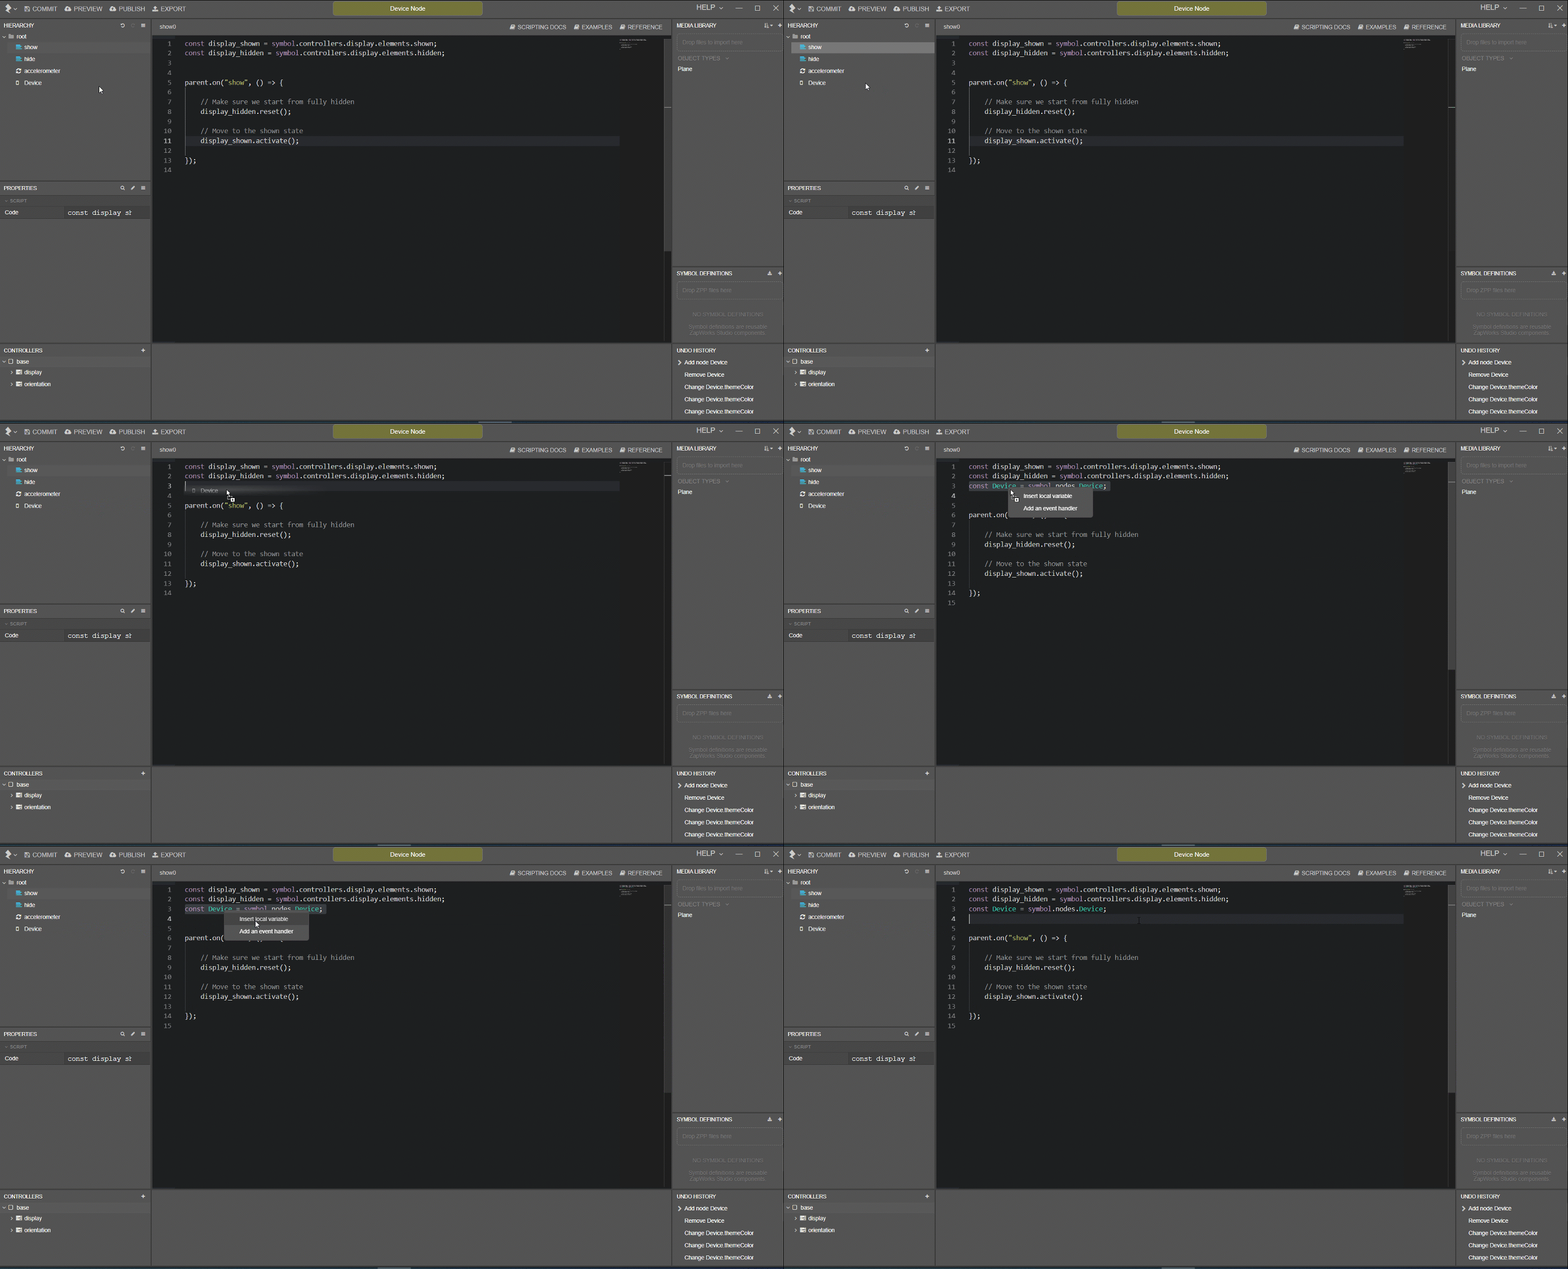
- Drag the device node into the script of your choice and select ‘Insert local variable’

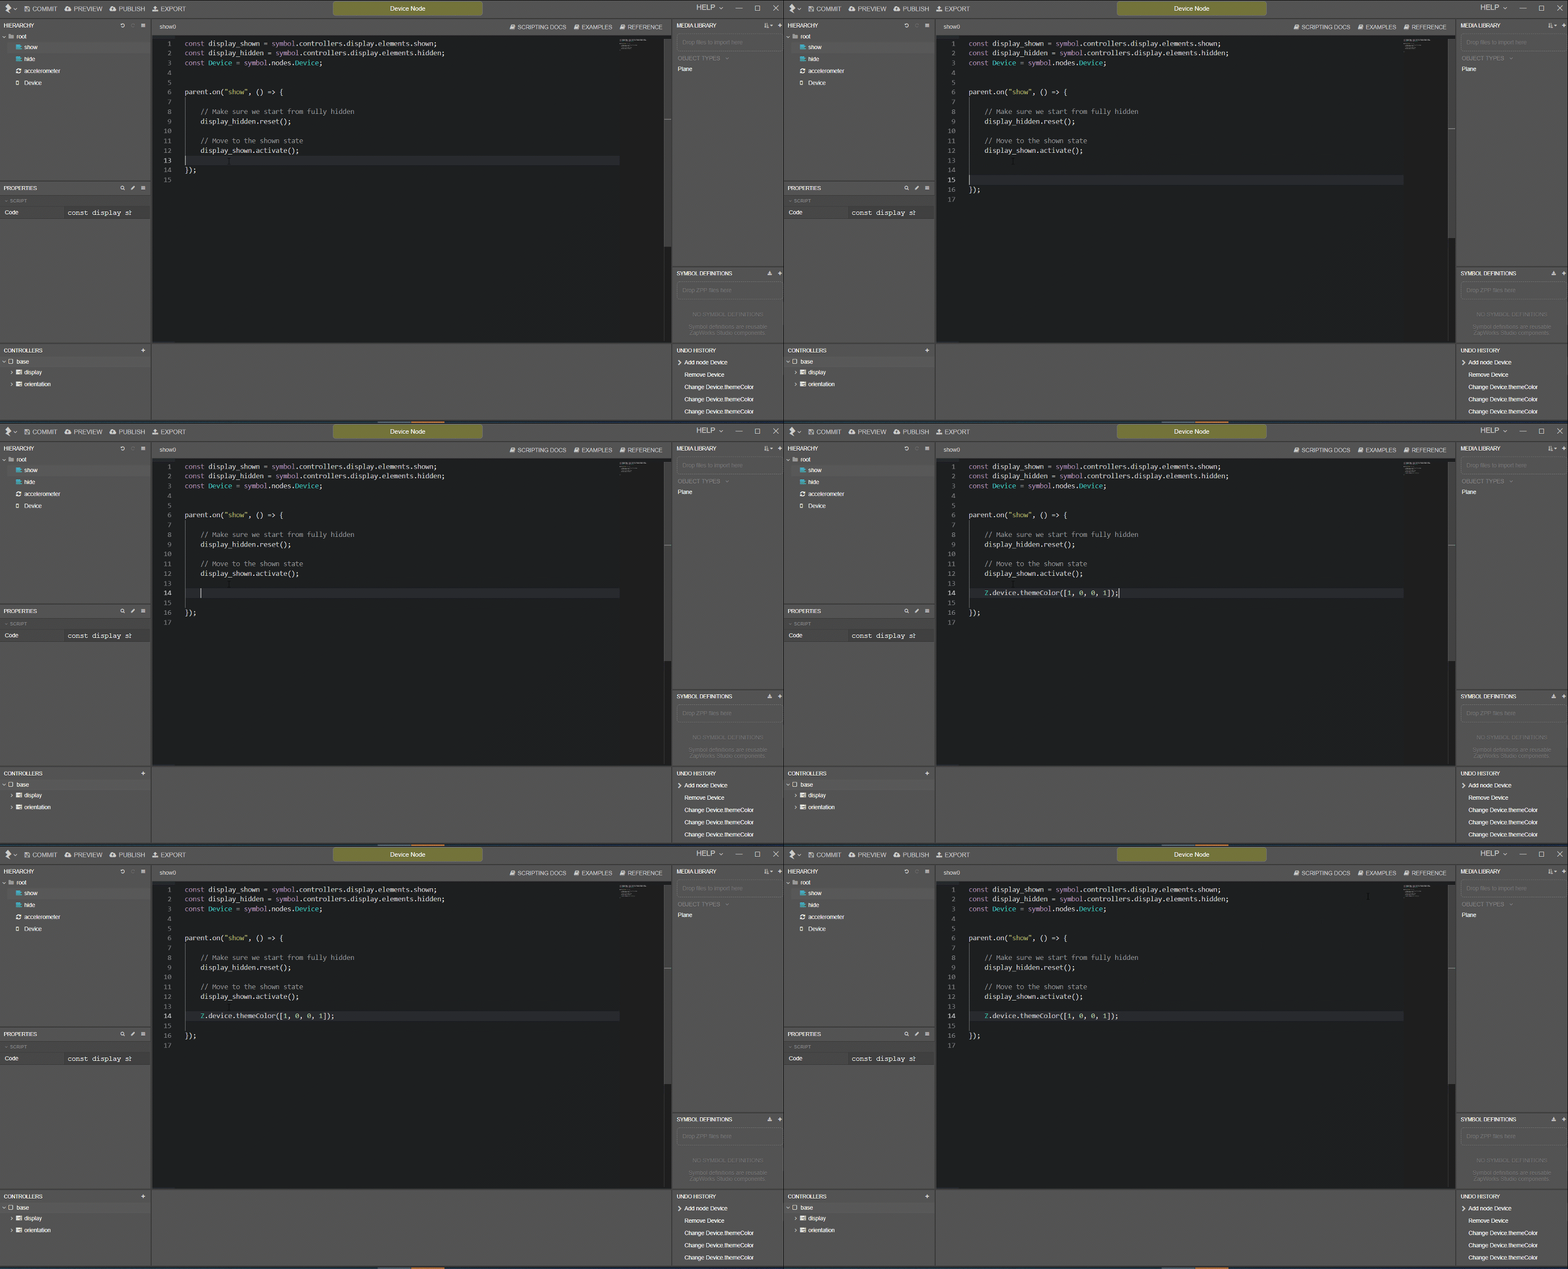
- Add the snippet for changing the app colour to the event of your choice. For example, here I have added a colour change on start-up using the script
Z.device.themeColor([1, 0, 0, 1]);, which will have the theme change to red.

The themeColor scripting reference is set up in the format [red, green, blue, opacity].
You can download an example project below, which will show an experience where the user can change the theme colour. This was developed using pointerdown events - feel free to take a look at the .ZPP for reference on your own projects!
Theme Colour Selector.zpp (97.3 KB)

Editing and removing the toolbar (WebAR)
Although you are unable to edit the theme / colour of the toolbar in WebAR, you can still customize the toolbar.
- Go to your project’s trigger tab.
- Select the burger on your trigger.
- Choose the layout tab, here you will find some customisation options.

- You can select whether the toolbar appears in your WebAR experiences or not, as well as decide if the rescan and menu buttons are visible on the toolbar. This can be especially useful if you wish to fully immerse your user in the experience and use the full browser view.
Hope you enjoyed this quick one - let us know if there are any other features of Studio you would like us to explain!
Adam
